Tuesday, October 2, 2012

An apology and a recipe!

Oh dear... Another four month radio silence on my part. I have no good excuses. And what's worse, I have to break the promise I made back in June of a tutorial for the hammock chair swing I made. I never got around to perfecting how it's hung, and as it was, it just wasn't right. And now that the back porch is filling up with the winter's firewood, the swing is now in storage for the winter. So sorry to anyone who was hoping for that tutorial.

Despite yet another hiatus, this blog still seems to be getting halfway decent traffic, which surprises me (in a good way!), especially since it's been 4 months since my last post! (Since then it's still gotten several hundred page views!) So welcome to any new readers! Please forgive my trend (which will probably continue, what with Baby Zoe due to arrive in a month and a half or less!) of long periods of time between posts. I have great ambitions to be an awesome blogger, but just haven't been able to put them into practice yet ;)

All that said, with the hopes of making up for the long break between posts and the lack of the promised tutorial, I want to share a recipe I invented today when struck with a craving for donuts. Pregnancy cravings are a bitch, especially when you live so far from town that it's not possible to just go to the store to satisfy them. Case in point- two weeks ago, after having a conversation about favorite Thanksgiving recipes, I caved and spent a Saturday cooking an entire Thanksgiving meal, just for the three (and a half) of us. A pregnant girl's gotta do what a pregnant girl's gotta do. So when a craving for donuts struck while trolling Pinterest, I knew the only way I'd get my fix was to get up off my bum and get in the kitchen. I didn't want to fry anything though, and decided that I wanted something lemony, so I came up with what is really a sweet, lemony challah recipe. Challah, a traditional Jewish bread, is light and fluffy and all around awesome, since it's enriched with lots of egg, and I figured it would lend itself nicely to a little extra sweetness and flavor. I used butter in mine, but if you're keeping kosher, just use veggie or canola oil instead. I decided to do these as rolls, rather than a traditional braided loaf, so that I could play around with toppings, and also so you get the most exposed surface area to get that awesome golden flaky crunchy crust that challah is famous for. You could always do a traditional braided loaf, or even just plop the dough in a greased loaf pan and call it good. The hardest part is waiting (and salivating!) while the dough rises!


Lemon Challah rolls- makes about 12 rolls

In a large bowl, or in the bowl of a stand mixer, combine 2 1/4 tsp yeast (1 packet) and 1/2 cup *minus* 2 Tbsp warm water and let sit until the yeast is dissolved, about 5 minutes.

Meanwhile, in a small bowl, lightly beat 2 large eggs plus 2 large egg yolks. Add eggs to the yeast and water, then add 4 Tbsp salted butter, melted and slightly cooled (so it doesn't cook the egg when you add it), 5 Tbsp sugar, 1 tsp salt, 1/2 cup all purpose flour, and 3 Tbsp lemon juice (fresh will be best, but I used bottled cause it's what I had).  Stir (by hand with a wooden spoon or rubber spatula, or on low speed with the dough hook) until well combined. Gradually add 2 1/2 cups all purpose flour, mixing by hand or with the dough hook on low speed, until the dough is smooth, firm, and quite elastic (adding about 1/4 cup flour more, if needed).  Cover and let rise until doubled in size, roughly 2 hours.

With lightly floured hands, turn out the dough onto a lightly floured surface and knead it a few times. Break off balls about the size of a lime and roll them into balls, place them on a floured surface or on parchment, cover again and let rest and rise for about 30 minutes.

Preheat the oven to 375 degrees F.  In a small bowl, whisk 1 large egg with 1 1/2 tsp sugar or honey.  Grease and sprinkle cornmeal on a baking sheet, or line a sheet with parchment, and place the rolls a couple inches apart on the prepared baking sheet.  Brush each roll with the egg wash, and bake until the crusts are a rich, dark, golden brown, and the bottoms sound hollow when tapped, about 20-25 minutes (when in doubt, go a little longer!)

In the last couple minutes of baking, combine 1 Tbsp melted butter and 1 tsp lemon juice. As soon as the completed rolls are cool enough to handle (but still quite warm), brush the crusts with the lemon butter, and roll them in sugar, and allow to cool (or chow down right away, depending on how patient you may or may not be!). Enjoy!

Edit: Now that we've had a chance to enjoy them, I just want to add- these are not as sweet as a donut, but I think that's a good thing! The lemon is subtle, so if you want them to really be lemony, add at least a tablespoon of lemon zest. I would have, had I had an actual lemon, but I just had bottled lemon juice so I went with what I had. If you want something really sweet, try a liquid glaze (like on a glazed donut). Yeast donuts in and of themselves are not very sweet at all, it's all in the topping, so keep that in mind if you're in the mood for something sweeter. Personally, the subtle lemony sweetness of these is perfect, not cloying or heavy. They'll be awesome as a breakfast roll (you can bet that's what I'll be having tomorrow!). They should be stored in an airtight container, either at room temp or in the fridge (that's up to you. I never refrigerate bread, but some do, and that's fine.).




Thursday, June 7, 2012

Tutorial to come soon!

Well, it's been a couple weeks since my last post, and what a couple weeks it was. We received some scary test results about the baby, but had to wait a couple weeks until I was far enough along to do more conclusive testing, and finally got the results of that test yesterday, and thank God the results are normal. It was a stressful, scary, worrisome couple of weeks, but that's all behind us now! So that was the reason for the radio silence on my part.  However, I just wanted to share a quick update that I am working on a tutorial for a super cool hammock chair I made yesterday, I've got to do some work on the rope lengths and make some cushions for it, but it's an awesome new addition to our back porch, and a lovely place to sit in the shade and ponder.  It might be a bit before I post the tutorial, but it will hopefully be by this time next week! Can't work on it this weekend, we're going on a canoe camping trip! WOOT! My favorite kind of camping, and Wyatt's first real camping trip (non car-camping or backyard camping, that is!)

Anyway, here is a sneak peek of the hammock chair!

Wednesday, May 23, 2012

One step forward, two steps back

Well, it's been over a week since the Great Chick Massacre.  The bear did indeed return that next night, and tore down the fence in the same place again (that we had just repaired), though he left the big coop (and the unknowing hens) alone, thank goodness.  We put up electric fencing, making two wraps around the outside of the big fence, first at about chest height, the second another 20" or so above that.  The controller box we had been given didn't work, so we bought a new, more powerful one.  It's capable of fencing up to 3 miles, which obviously is far more than we could ever possibly need here, but we'll certainly take it along with us when we finally get around to selling this place and moving on to larger (and hopefully greener) pastures.  Since the hot fence has been up, we haven't seen sign of the bear returning, though that doesn't mean he hasn't been here (he just hasn't tried to break in again, or if he has, he got a nasty zap and moved on).  We haven't had a chance to figure out a new brooder box situation yet, though I think any future chicks would be best off being inside the coop, and the hens will just have to deal with the temporary intruders.  The problem we now run in to of course is the availability of chicks, particularly of the breeds we want.  Buff Orpingtons are common enough, especially around here with our harsher winters, that they're pretty available at local feed stores, but if we want Black Australorps again, our luck may not be so, well, lucky.  The feed stores don't carry them, and most hatcheries I've found don't have them available until late June or even July at the earliest (and they're the same hatcheries the feed stores would order from, so there's no better option).  Bummer.  And frankly, the thought of going through another month of fragile chick stage is just not all that appealing.  At least this time the weather is warm enough for them to be out in the coop from the get-go (instead of spending the first week in the house, stinking up the place), but still... Another month of cleaning butts and twice-or-thrice-daily refills of water and food (as we don't have big waterers or feeders for the wee-uns) and constant turning on or off of light bulbs to try to keep a constant temperature (Ok, so the cleaning butts part only usually lasts the first week, maybe two... but still...).  I know the end result will be wonderful, and we feel obligated (and rightly so) to make it up to those for whom we were raising the chicks, but it's hard to think about starting over from scratch, and so late in the game.
As a result of the damage and fence work that needed to be dealt with, we haven't had the time to do some much-needed work on garden beds and the A-frame greenhouse, and so are late to plant a number of things.  We always buy tomato starts, since we've rarely had luck starting from seed with our short season (even when we start indoors), but it means we'll also have to buy squash starts and maybe even bean starts.  We're planning on rebuilding the bed that runs the length of the front of the house, and I was going to plant calendula in it, but it's probably the lowest on our priority list, and so won't happen for several more weeks I'm sure.  Calendula will bloom into late fall (we had new blooms opening up even after our first significant snowfall in November), but I was hoping to have improved our curb appeal by the busy part of summer, which officially kicks off this weekend.  So unless I get on the ass end of a shovel and do it myself while Red is at work, that probably won't happen for a bit.  Not to say I couldn't do it myself, but I'm not so sure just how long my pregnant body would let me work a shovel before it decides enough is enough, and we're left with a half-torn-up front yard... ;)  So we'll see.

And in random but fabulous crafting news, our local Walmart has finally gotten its head somewhat dislodged from its you-know-what and re-expanded its fabric department!  It is nowhere close to its original glory, but it is a big improvement over what it has been.  It really was horrendous timing on their part, when they severely downsized the craft department several years ago, as I think it's pretty evident that during economic downturns, we see a sharp rise in handicrafts and do-it-yourself type stuff.  The most ironic part of it all is that the craft department lost out to a massive expansion of the electronics department, which probably saw a considerable decrease in sales in the past few years (or at least I'd think it would have...), but then again the "average American consumer" does some pretty mind-boggling things (at least in my opinion)(um, hello, Black Friday...), so maybe I'm just totally off base.  But I know where MY money is far more likely to be spent, so that's gotta count for something, right?!?  Anyways, I'm quite pleased that they've expanded their fabric inventory, but it just means I've gotta get my butt in gear and get to work on all the projects I've got lined up already before I can go splurge on some new fabric for my stash ;)

Tuesday, May 15, 2012

The circle of life, or some sh*t...

Well, last night we lost all our chicks to a bear.  And what a ruthless bear it was.  I discovered the destruction this morning when I went to let the hens out and check on the chicks, and it was like stepping into a war zone.  What we thought was a strong, nice, high fence, was buckled and smooshed, the big sturdy brooder box torn apart (Not just broken in to, but torn apart, and the thing was built like a freakin tank, it was only a 4' cube but weighed several hundred pounds and was made of 2x6's and stout plywood, with construction sturdier than most houses...) and the carnage... Oh, the carnage... 45 chicks must have been quite the meal (I originally thought we had 46, but my math was off), as there really wasn't much left, though little bits and pieces and just a few mostly intact casualties were strewn all over the pens.  I shudder to think what a terrible end they met last night.  I am quite thankful that our hens are all ok, but now we're worried about their safety, as surely the bear will be back for the main course, now that the appetizers are gone.

I'm feeling lucky that the friend who paid for all the chicks (in exchange for us raising them, and him getting about 18 of them once they were grown enough) is very understanding of the situation.  Pissed, I'm sure, as they weren't cheap, but understanding.  If we had paid for them ourselves, I'd be super pissed.  As it is, what upsets me the most is the time that is now gone.  The Buffs were a full month old, and the Australorps were just a few days shy of a month, and with chicks, the first month is the hardest and most involved (and the entire reason why we were doing the dirty work for others, if it weren't a pain, they'd have done it themselves).  We were SO close to having them weaned off of light, and therefore ready to move on to their next homes, but now we have to start over. And more than just over, cause it's not just a matter of ordering more chicks, as we now have to figure out a new brooder box, and install electric fencing.  We should have done the fencing last year, but we couldn't afford a new system at the time, and thankfully we've since been given a used controller box dealie and the wire, but we still need the little transformer clips that you attach the wire to the posts with.  Not a big expense, and really there's no excuse for why we haven't done it sooner, but we just didn't, can't change that, and now we can't change what happened last night.  All we can do is move forward, do our best to protect the hens and any future chicks or livestock, and deal with whatever may happen in the future.  Hakuna Matata, or something...

Monday, May 14, 2012

One more indispensable book for your library!

I can't believe I forgot to include the Ball Blue Book Guide to Preserving in my list yesterday! Preserving food is a big part of our homesteading life, and it is one of the easier ways to make a difference in your food bill's bottom line.  Whether you grow your own foods to preserve, harvest from the wild, or take advantage of produce sales in season, canning and other preserving methods are staple skills to learn.  While The Encyclopedia of Country Living definitely covers food preservation, the Ball Blue Book is such an easy reference with great and easy to follow instructions for all types of food preservation, and more recipes than you could probably use in your lifetime.

Sunday, May 13, 2012

Indispensable resources for your homestead's library

This morning as I looked at our bookshelves, I wondered how much we could have accomplished without the aid of some pretty fabulous books we own.  I have a feeling that without them, we'd have muddled things up pretty badly.  So I thought it would be a good idea to share the books and resources that we think are indispensable, ones we return to regularly and not just ones we read once and call it good.  I should add that I am in no way being compensated or bribed to mention any of these, and though I'll provide Amazon links to them, I'm not getting any commission or anything whatsoever.  These books are just that good.  And though I call it your homestead's library, you don't have to have a big garden or livestock or even a back yard to learn valuable and useful information from any of these books that you can then apply to your day to day life.  Your homestead could be anything from an apartment to a sprawling ranch.  If you are able to incorporate homemade/handmade/homegrown/DIY anything into your life, I consider that homesteading.  It's a way of life rather than a type of dwelling.  So, that said (and keeping in mind there are hundreds of books out there that I'm sure are great but that we haven't read or don't own), here are the books that have helped us immensely along the way!

The Encyclopedia of Country Living by Carla Emery- If your library had room for only one book, this would be it.  It has a wealth of in-depth information on everything from buying land to growing food and raising livestock to recipes for that food and livestock to how to birth a baby in an emergency.  Many other encyclopedia type books give general and short descriptions or information, but The Encyclopedia of Country Living is where to go to find out the details.  (I'd say look no further, but then you wouldn't need any of the other books I'm about to recommend, and this would be a pretty short blog post. Even though you probably could look no further...)

Mother Earth News Magazine- Ok, not a book, but just as important to us as The Encyclopedia of Country Living, and it is the one and only magazine that we regularly re-read old issues of.  Also, it is one of the most read magazines in the country, not in overall readership numbers, but in that its readership literally reads the whole magazine, cover to cover, every issue.  Also, every article ever printed is available for free online on their website (along with countless online-only articles and blogs), and if you prefer to own the information but don't have room for every back-issue, they offer a collection of cd-rom disks with every article from every issue since the magazine began in 1970.  Seriously, if you care about self-sufficiency, raising quality food (flora and/or fauna), or being good stewards of our land, get a subscription. You won't regret it!

Back to Basics by Abigail Gehring- Consider this one a less in-depth but more visual version of The Encyclopedia of Country Living.  Most topics are covered in a single page or two, so it's by no means exhaustive, but it's fun to read through and has great diagrams and photos of lots of different DIY ideas for all around the home and farm.

Rodale's Illustrated Encyclopedia of Organic Gardening- Though growing your own food is a big part of modern homesteading, I'm only going to include one book on gardening, and this is it.  It's much more about technique than specific information about individual plants.  If you're looking for a guide with info on individual plants, there are zillions of books out there like that, all good in their own ways, and if you can find one that is specific to your region, the better (for example, Sunset's Western Garden Book is great if you live in or west of the Rockies).  But if you want to learn HOW to garden organically (the best way, and what should be the only way), then Rodale's is the place to go.  It's one thing to look up that a certain plant likes a rich, well drained, loamy soil, but those books don't usually tell you how to make your soil rich, well draining, and loamy (or even what loam is). Rodale's does, and then some.

Encyclopedia of Herbal Medicine by Andrew Chevallier- This is an absolutely excellent resource if you wish to reduce your dependence on conventional medicines.  Whether you grow your own herbs, or buy supplements from a store, this will tell you what to look for to help with all sorts of ailments.  I've successfully fought off multiple ear infections that otherwise would have needed full courses of antibiotics, with information from this book.  (Disclaimer- I'm not saying you should ditch going to the doctor in favor if this book, but it is very helpful, especially in a pinch if you can't get to the doc quickly enough, or in conjunction with conventional meds from your doc.)

Artisan Bread in Five Minutes a Day by Jeff Hertzberg and Zoe Francois- We haven't bought storebought bread in nearly two years thanks to this book (which we learned about thanks to Mother Earth News).  This book was an excellent stepping stone to getting creative on our own with our breadmaking, which is totally doable and not scary once you've mastered the techniques and understand the processes in this book.  There is another similar version of this book, Healthy Bread in Five Minutes a Day (same authors), that is essentially many of the same recipes, but with more whole grains used, and less salt (though once you are comfortable with the basic recipes and techniques, those are modifications you can make without a specific recipe, so adding one or the other book to your library would probably be sufficient, unless you're uncomfortable with baking without a specific recipe, which is totally understandable).

One of the easiest ways you can incorporate homesteading into your daily life is by making your meals from scratch and not eating out, and two great cookbooks to help you do that are How to Cook Everything by Mark Bittman, and The All New Joy of Cooking by Irma Rombauer, et. al. (these are both links to the editions I have, though there are newer editions of both cookbooks).  Both books are very similar, so you could easily get away with just one (and of the recipes I've tried out of both books, Mark Bittman's versions tend to involve less butter, so make of that what you will, teehee), but they are great for learning the basics as well as more complex recipes, and they both include techniques that are important tools, not just recipes.

Homemade by Reader's Digest- Consider this a cookbook not only for edible goods but also many household goods.  I'm a big fan of many Reader's Digest books, and this one doesn't disappoint.

Crafts and Hobbies by Reader's Digest- This is an older book, but is a lot of fun and great inspiration if you want to try your hand at traditional and useful handicrafts for the home.  Reader's Digest makes a lot of great craft type books, and I'm also a fan of their Complete Guide to Needlework and their New Complete Guide to Sewing, though keep in mind the latter should really be called the Complete Guide to Garment Sewing, as it is almost exclusively garment related techniques, and though it is a new edition, the projects included are, well, dated. (This version has a sticker on the cover that says the projects are new, so maybe they are, but my edition has some pretty special looking projects despite having the same cover, though without that sticker.)

Emergency Food Storage and Survival Handbook by Peggy Layton- Self-sustainability is not just about making your own food or clothing or what have you, but also your ability to sustain yourself should the worst happen.  Food storage didn't used to be a 'weird' or 'survivalist' thing, it was absolutely necessary from a day to day life standpoint (and not so long ago, I might add).  Just because most Americans have easy access to well-stocked supermarkets now doesn't mean you should become complacent.  We by no means believe in silly Doomsday prophecies or anything like that, but disasters (both natural and man-made, widespread or personal (like an injury that keeps you from being able to work) can occur anywhere at any time, and can affect your ability to aquire food for days or even weeks at a time, and so being able to feed yourself and your family and keep them safe and healthy until things return to normal is a responsibility that many of us would struggle with today without a little forethought.  This book will help you become self-reliant should the worst happen (God forbid), and will help you determine the best foods for long-term storage and how to prepare them if you need them.  (Also, many long-term storage capable foods are foods we use on a regular basis as our staple foods, such as wheat berries and dried beans, so you don't have to stock up your pantry with stuff you'll never use, and they're much more affordable than their ready-to-eat counterparts.)

And that is my list for you today.  I'm sure there are many other wonderful books out there that are deserving to be on this list, but these are the ones we have found to be truly useful to us, and I hope that they might be useful to you as well!  Happy reading!

Thursday, May 10, 2012

This much is true- I am a terribly infrequent blogger. Not for lack of want, I have big aspirations to be an awesome blogger with dozens of sweet crafty tutorials and all that, but the bottom line is tutorials are time consuming, and I usually don't think of making one until I'm done with the project that I think would be cool to do a tutorial on. It's also not for lack of time, as I waste plenty of time on facebook and whatnot, though the opportunity to sit and write uninterrupted for an extended period of time does not happen all too frequently.  It is what it is.  Perhaps I should just lower my expectations, and maybe I'd be more prone to blog the little things more often?  Maybe I'll give that a try. In the meantime, a springtime catch-up:

Things are moving and shaking in the Hefner household as of late.  We had a mercifully mild winter, and as a result we've had a mercifully early spring (or at least we've been able to dig in the dirt earlier than normal, which is as good a sign as any of spring for us).  Wyatt turned 4 in April, which is nuts, and the BIG news is we're expecting another little Hefner come November! (And the first ultrasound seems to indicate little Hefner is a girl (!), though we'll hopefully officially confirm or deny that with the next ultrasound in about two months.) With Wyatt, I was pregnant throughout the colder months, so I'm actually excited to enjoy a summer barefoot and pregnant (and yes, I know that term has negative connotations, but not to me, I love the image it conjures).

Not only are we adding to our human flock, we've also added quite significantly to our avian flock this spring.  We've been brooding and raising a total of 51 chicks the past four weeks, though 6 have already left us for their new home with friends, and another 25 or so will go on to other homes as well once they're a bit bigger.  The remaining birds will be ours, though we'll probably only add a maximum of four to our laying flock. The rest are destined for the freezer (both ours and others), which we're really excited about (in what hopefully doesn't come across as a creepy way).  I could say a LOT about factory poultry farming practices (as frankly, I think those chickens have it the worst of any factory raised livestock), but I won't, cause we still buy conventional chicken at the grocery store, and can't afford to buy locally raised meat, though I'm very happy to be able to reduce the amount of conventional meat we have to buy.  Anyways- We started out with 25 Buff Orpingtons (same breed as our laying flock), and 26 Black Australorps, which is also a heritage breed that was bred in Australia from Orpington stock, so in all a very similar bird though potentially a bit smaller, and of course black, not buff.  The Australorp chicks were super cool looking, a mix of black and whitish yellow, with interesting markings especially on the face, and once they're full grown they'll be all black with an almost greenish iridescence.  The Buffs are a week older than the Australorps, and already we can tell we've got one confirmed rooster among the Buffs.  We'll hopefully be able to tell soon if any of the Australorps are roosters as well (even though the chicks were sexed before we got them, there is about a 10% chance of getting a rooster, so if we only end up with one out of 50, I'll be somewhat surprised).  We'll see how it is raising roosters, but if we do end up with an Australorp rooster (and he's not an ass), we might add him to our permanent flock just for fun.  (And the four hens that we'll add to our flock will be Australorps, so we have some variety, and also so we can tell who's who as far as age in our flock)

As if 59 hens and chicks wasn't enough, we're hopefully going to be getting some pigs this summer as well.  Whether we build a new pen for them, or wait till the chicks are all off to their perspective homes (be them coops or freezers), is yet to be seen, but we're hoping to raise two pigs for meat.  And if we do it right, by selling quarters or halves, we'll get the weaners (weaned piglets) and also hopefully some of the feed at no cost to us (This is also how we've done the chicks).  We've switched our regular feed store, and are much happier with the new one, as they are much friendlier and more helpful and don't give you dirty looks if you dare ask a question that indicates you weren't born and raised on a ranch or farm and should know this stuff you city slicker idiot... (I digress...)  Anyway, the new feed store has excellent connections for affordable weaner pigs (which has been our problem for over a year now, we wanted pigs last summer but couldn't find affordable weaners), and the owner's parents own a well established rabbitry, should we decide to also do rabbits (which we've also been thinking about for a long time).  So it is pretty cool that we're able to raise all this livestock on little over a half an acre.  Too bad we also can't raise all their food too ;)  But at the very least, we're able to ensure they live a happy and healthy life, and that's the best part.

And yes, of course we're getting the garden going too.  We've already got a bunch of kale, swiss chard, spinach, collard greens, chives, and a plethora of onions coming up from last year (maybe this time we'll be able to enjoy all those greens before the deer do)(plus strawberries, blackberries, raspberries, and asparagus, which is finally on its third year, which is the first year you can harvest from, so we're anxious to see what we get).  We've got lettuces coming up both in and out of the greenhouse, and have been working on a new bed for the herb garden.  We've decided not to do potatoes this year, as they take up a huge amount of garden space and are so cheap at the store anyways, but we've been struggling to figure out what to fill their old beds with!  Also, we're not doing tomatoes in the greenhouse, instead we're making a new greenhouse out of an old A-frame metal swingset that we got for free from our neighbor, and that will be for the tomatoes, and we're going to try our luck at summer squash and maybe even melon in the greenhouse.  The cherry trees are blooming right now, and we're going to redo the bed along the front of the house, and will plant calendula all along it, as it did amazingly last year, bloomed sheer into November, and it's a wonderful medicinal herb (we're making calendula oil with last year's flowers).  Still to come to the garden- garlic, comfrey, more chives, lemon thyme, oregano, beans and peas, and who knows what else!

Ok, now that we're marginally caught up on the springtime goings on, I'll call it good and we'll just have to wait and see how long it takes me to make another post... ;)

Wednesday, November 2, 2011

Well, I did it yet again- I let another exorbitant amount of time go by between posts.  And shame on me that it happened during the growing season!  I had great intentions of posting at least weekly this summer, with updates on growth progress and planting and all that, and clearly that didn't happen.  Not to say it wasn't a busy and eventful summer (perhaps because it was a busy and eventful summer?).  

Things did pretty well in the garden this year, and I think we were both happier with our choices of where we planted what.  The greenhouse was almost exclusively tomatoes (three different varieties, Yellow Pear and I can't remember the other two...), though we also had blackberries (thornless) and strawberries (Seascape everbearing) in there too.  Though not unseasonably early, we have had some cold weather this fall, and none of our tomatoes were able to ripen on the vine.  After several days and nights of having to run a space heater in the greenhouse to ward off the frost, we decided our electric bill would appreciate us ripening them indoors.  We've had excellent success, some huge tomatoes (the largest weighing in at 1 lb .3oz), and made 4.5 quarts of awesome salsa.
ripening tomatoes
awesome salsa! 
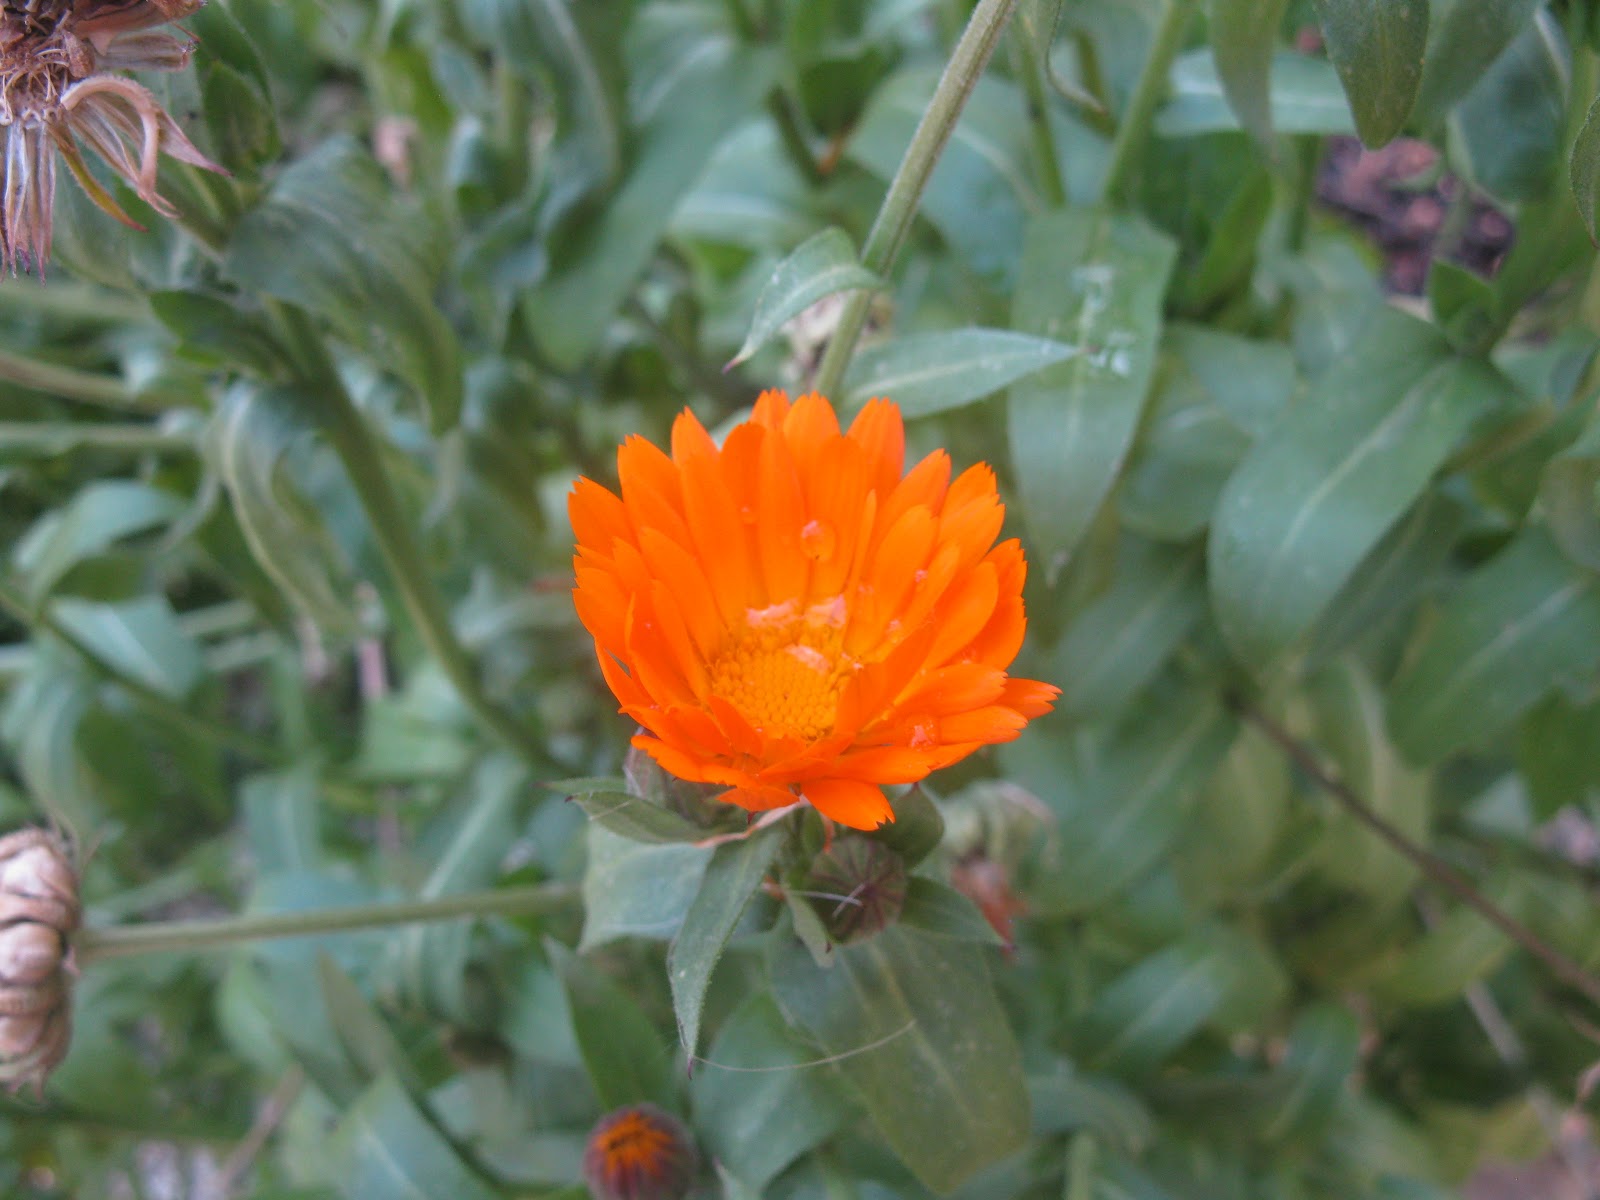
In the front bed, we had six different lettuces- three romaine types, and three loose leaf mix types.  The lettuce was great in the beginning, but we had some pretty hot and dry weather that turned it all bitter a lot sooner than I'd have hoped (it has since become fodder for the hens, which they are very happy with).  Our herb bed did marginally well.  Only one basil came up out of who knows how many seeds, though I think it was largely due to overcrowding by all the tomatillos we didn't plant...  (We had a LOT of 'volunteers' come up in just about every bed this year, from seeds that survived the winter in the compost- mostly tomatillos, and a good number of squash and pumpkins.  One spaghetti squash came up in the greenhouse, and produced an ENORMOUS squash, easily a 5 pounder.  And we ended up with 5 gallons of tomatillos, which is nuts considering we never meant for them to grow in the first place!)  Our Calendula did fabulously, it bloomed for months and months (it's STILL blooming, in November! Bonkers!), and you can bet we're saving as much seed as we can.  Calendula (or pot marigold) is a wonderful medicinal plant, and the variety we grew is a medicinal variety, so we're saving the flowerheads as well.  It's mostly used for topical ointments for cuts, bruises, rashes, etc.  
A stoic Calendula bloom, bright and shiny in November!


Our potatoes did marginally well this year.  We planted a different variety than last year, a standard yukon gold, but they were slow to start, had pretty small foliage growth, and they all got hit by some sort of blight.  They yellowed very prematurely, and many of them died above ground.  Despite their ill-health, we still got a good amount of potatoes, but not as much as we would have expected from the number of plants we grew.  Oddly enough, some of the sickest looking plants yielded the most/biggest potatoes, so maybe they were just putting all their energy into growing below ground rather than above.  We won't be saving any of these for planting next year, we'll have to figure out a better variety.  Maybe the Russian banana fingerlings we did last year, as those were healthy and beautiful and delish ;)

Our hens are doing marvelously!  They are BIG birds, and they're a riot.  They're pretty quiet, until you come in their pen, then they get noisy and silly and Wyatt loves to chase them.  And you definitely can't wear crocs in their pen, cause they see those little holes as an invitation to peck your toes!  We got our first egg from them a few weeks ago.  It was so cute and little!  For a while, it was clear there was only one layer, but now they are all starting to figure it out!  Still not sure how many of them are getting to it, as the number of eggs varies each day- Yesterday, two.  Today, five!  But the eggs are gradually getting bigger, and they're finally figuring out what those nice cozy boxes in there are for!  
Well hello girls!
A nice cozy nesting box, finally being put to use!
 As winter is just around the corner for us (it's flurrying as I type), we've been putting things away for the winter, stocking up on wood, and doing a good amount of canning.  We bought 8 heads of cabbage in September and made a huge batch of the best sauerkraut we've ever had.  Aside from requiring 6 weeks of patience, it was crazy easy to make.  We also made a green salsa with half the tomatillos we grew, and a sweet jam with the other half.  We still have cherries and peaches in the freezer to make jam with, as when we put that up, it was too hot to cook and can jam.  Better to save that kind of chore for when slaving in a hot kitchen is a cozy thing to do!
Stocking up the root cellar
As for sewing projects, it's been a busy summer.  I made the first pair of pants for Red out of a plain cotton canvas, but the fabric turned out a little too lightweight, and they shrunk quite a bit lengthwise.  They're good summer weight pants, except for the nasty tear at the shin that happened the first time he ever wore them, while on a hiking trip.  Whoops...  To make up for it, I finally got around to making him three, yes three, pairs of heavy denim jeans just a couple weeks ago.  They came out excellent, will hold up much better to the heavy abuse Red inflicts on his work clothes, and are definitely long enough this time.  I also turned some truly vintage quilt blocks into a tablecloth.  The blocks were passed down to me from Red's grandmother, though they were actually sewn (entirely by hand) by HER mother, anywhere from 60 to 90 years ago.

And now that we're officially on the holiday countdown, it's time to start work on Christmas gifts.  Still not sure on every item, (I've had a number of requests for aprons!) but I'm experimenting with some homemade slippers- I made the first pair for myself, but might try something a little different for a second pair (for myself as well, teehee).  Wyatt definitely wants a pair though, and keeps trying to steal mine!
Soft and fuzzy slippers!
Just a sneak peek, as this is a gift yet to be given, but wanted to share my first friendship star quilting project ;)
Then of course there's what we want for Christmas, which I am SO excited for, and will be getting early, from my awesome parents- an electric grain mill!!!  We've had our hand crank mill for over a year now, and definitely won't be going back to only storebought flour, so it's about time we treat ourselves to a mill that doesn't feel like a workout or chore!  I think we've decided on the Miracle grain and flour mill, as it will be able to handle larger stuff like beans and corn, and it doesn't create a mess of flour dust like the other home flour mills available.  I've been given the go-ahead to order it whenever, and though I'd love to be patient and wait till Christmas, I don't think I can wait much longer!  Perhaps I should use this as an excuse to end this blog post?  Hmm... sounds good to me! ;)

Friday, July 8, 2011

Most recent sewing projects

Before my project list is taken up with pants after pants after pants for Red, I decided to do some me projects.  Two are re-fashions (turning old clothes into new), and one is made entirely of fabric I got for free (go freecycle!).

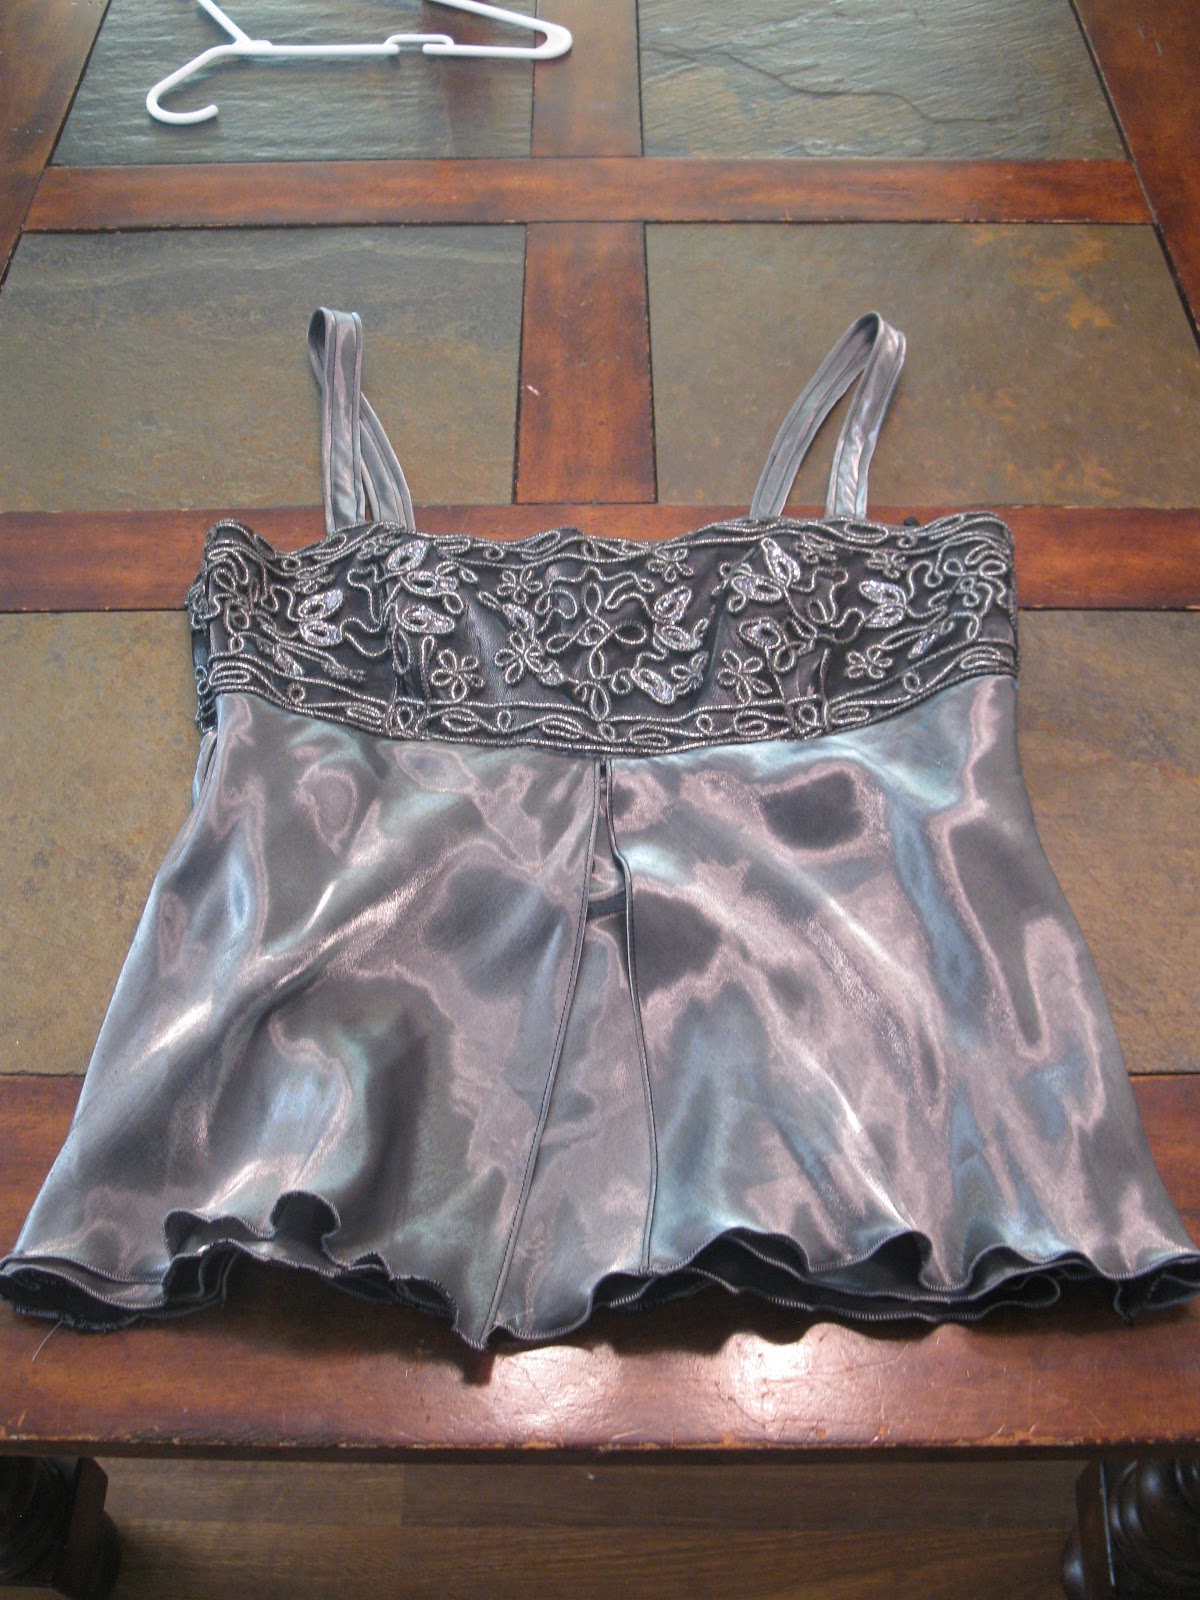
The first project was turning a rather formal gown into a fun top and skirt!  I started out with the dress I wore for my college graduation- a gorgeous embroidered sparkley thing, far too formal for anything I would ever go to, ever... But that was just too fun to let go to waste in my closet.  Biting the bullet and cutting it in half took some courage, but I'm SO glad I did!  The top turned out great- I did a rolled hem along the bottom (love my serger!), replaced the super-thin spaghetti straps with wider ones, and made a new zipper pull (the old one was broken off).  The fabric is a very slinky acetate, which has a gorgeous drape, but is dry-clean only, so this will be a special occasion shirt.  I don't do dry cleaning ;)  The skirt, on the other hand, didn't turn out as great.  It was tricky, since the new waist where I cut it was far too wide (the dress originally was flowy, not fitted), so it took some finagling to get it narrow enough to not look weird but still big enough to do an elastic waistband (hadn't thought about needing a zipper until it was too late).  Also, I shortened it by several inches (I needed the fabric for the new shoulder straps), so that made figuring the waist a little funkier.  Meh, I was more excited to have the top than the skirt anyways ;)

The second project was turning an old skirt into a new halter top!  I had a cute organic cotton skirt from Patagonia, but it wasn't something I wore frequently at all (in fact, it was in the giveaway pile until I realized I could use the fabric for something else).  It's a thick, stretchy jersey, and perfect for a pattern I had in my stash for a halter top, so yesterday I just went for it and made it!  I hadn't sewed from a pattern in a few years (since my Dorothy costume, in fact) and I had forgotten how much I like sewing from a pattern!  It takes all the worry and guesswork out, which may seem like it takes the creativity out, but whatever, it was easy and quick and turned out perfectly, which I can't say would have happened had I made it up as I went!

And the third project was a nice lightweight nightgown, made of fabric and some lace trim that I got on freecycle last year.  I did use a pattern I had to cut the pieces, but constructed it my own way, and I like it!  Nice and light for summer!


Oops, I did it again...

Oops... I let another long span go by between posts... I had great intentions of keeping up much more closely with my blog this summer, keeping up with regular updates on the garden and whatnot, but that just hasn't happened.  Summertime is twice as busy for me as wintertime, since I have both the inside and the outside to take care of!

The garden is doing really well, things are finally starting to look like plants!  Our first crop of lettuce in the greenhouse is long gone, replaced by lots of tomato plants, the blackberries in the greenhouse are growing, and we've already tasted the first strawberries!  Outside the greenhouse, our outdoors crop of lettuce is getting gorgeous, the potato plants are shooting up and filling out with gorgeous foliage, beans and peas and greens are growing, and the cherry trees are laden with young fruits.  Our hens are doing wonderfully!  We now have 10 Buff Orpingtons (got two from Red's mom that are a couple weeks younger than the original 8), they're about 3 months old now and SO BIG!  They look full grown, but they aren't done yet!  They're probably only around 2-3lbs right now, if that, and Orpingtons can get to be around 8lbs!  They are a hoot to watch, fun to hang out with, though don't wear sandals (and especially not crocs!) cause they love to peck at toes!  The very best is letting them out of the coop in the morning.  They fly and flutter and run around, so glad to be out in the fresh air!

We've had quite a few run-ins with bears this year, far more than usual, and have had to stop composting for a while until we can get some electric fencing up.  We've never had problems with critters like this before.  We had a couple visits last year from bears, but there was a period of about two weeks where we had a bear almost every night, and several visits during the day, which is not so common around here.  We even had a bear rip the cam-strap off our trash can, which has never failed us as bear protection before, so now we keep the trash locked in the zircon up the hill.  We haven't had any trouble the past two weeks or so, but for a while it was getting pretty ridiculous, and we now have a rule that no one goes outside without the dog (at any time of day or night).  Whiskey has definitely earned his keep, chasing bears away!  I'm just thankful we don't have any grizzlies around here, that our bears are relatively smaller and less aggressive black bears.

I'm extremely excited, because a big order of all sorts of fabrics is due to arrive this afternoon!  I'm going to be rebuilding Red's work clothes wardrobe from scratch, and I'm actually really excited about it!  I've made pants before, but never anything with a true tailored waistband and fly.  It should be a really fun challenge, and I can't wait to take it on!

In the meantime, some pictures of the garden and hens, taken today!

 The lettuce and onion bed!

 Blackberries climbing in the center, tomatoes around the walls, strawberries everywhere else

 Pole beans


Some of the many potatoes!

Friday, April 22, 2011

You can bake! And the ultimate pizza dough!

Since last fall, we've been baking all our own bread.  There's always a loaf on the counter or dough in the fridge (and usually there's both!).  Baking bread is so easy, and not at all the time consuming task non-regular bakers think of.  Baking seems to be enjoying a bit of a renaissance these days, and I want to spread the good word!

Bread Basics
Great bread is all about ratios.  Stick to the correct ratios, and you really can't go wrong!  The magic numbers are these: 1.5, 1.5, 3, 6.5.  That's 1.5 Tbsp yeast, 1.5 Tbsp salt, 3 cups water, and 6.5 cups flour.  It's so simple it's crazy!  And you can follow the same numbers for substituting, as long as the total numbers stay the same.  (Don't substitute anything for the yeast or salt, those are key ingredients!)  For example, I like a softer sandwich loaf, so I do 1.5 cups water and 1.5 cups milk.  As long as it's 3 total cups liquid, you're good to go.  Same goes with flour (though I don't recommend using more than half whole wheat, it makes for a very dense loaf).  I also like adding some sweetener (usually honey), but that doesn't follow a set ratio; I usually add a couple tablespoons of honey, I don't really measure (but it's not crucial to measure it).  Same goes for adding a fat (butter, oil).  I usually just add a few tablespoons.  

Mixing Method
In a large bowl (or a large stand mixer with a dough hook), add the liquid (room temp or slightly warmer, not hot but not cold), yeast, and salt, (and fat and/or sweetener if you're using it) and stir to dissolve the salt.  Then add in 6 cups of flour, and mix it all together with a wooden spoon (or on slow speed) (add the last .5 cup flour if it's too wet).  You want it to be fairly wet, but dry enough to feel elastic.  Don't mix with your hands if you can avoid it- this often leads you to add too much flour.  The dough should still be pretty dang sticky.  Cover it with plastic wrap, and let it sit for about 2 hours.  Don't worry about punching it down, or whether the volume doubles or triples.  It doesn't matter! The yeast knows what to do!  If you're not ready to bake after the 2 hours are up, pop it in the fridge.  It is wet enough to last several days to a week!
Elastic enough to form a ball, but the shape shouldn't last long!

Baking Time!
After the 2 hour rising mark, you're ready to shape.  This recipe works best for free form 'artisan' style loaves, rolls, etc.  (See below for sandwich loaf variation)  Flour your hands and your work surface liberally, and flour the top of the dough.  Liberally sprinkle corn meal on a baking sheet.  Grab a good hunk of dough, form it into a ball, and place it on the corn mealed baking sheet.  Allow to rise uncovered for half an hour.  A few minutes before baking time, preheat the oven to 450 degrees F.  Melt a tablespoon of butter (salted or unsalted, your choice) and gently brush the surface of each loaf.  Bake for at least 30 minutes, but possibly as much as 45, depending on the size of the loaf.  The top should be crisp and browned, not just golden.  Trust me, it's way better to overbake than underbake!  Allow to cool completely before slicing, if you can resist!

The Ultimate Pizza Dough
This recipe follows the same ratio, only on a 2/3rd smaller scale, and will make a beautiful big and fairly thick pizza (after all, delicious dough deserves a thicker crust!).  Follow the above ratio if you would rather make two medium pizzas, or one large and some breadsticks, etc.  

2 cups water
1 tbsp yeast
1 tbsp salt
1 tbsp sugar
2 tbsp olive oil
4 cups flour (I think it's best half white flour half whole wheat!)

Combine the first five ingredients as directed above, then add flour and mix and allow rise as directed above.  After the 2 hour rise, you're ready to shape your pizza.  You'll need a LOT of flour on your work surface and hands and rolling pin.  Preheat the oven to 450, and prepare your toppings.  Cover a baking sheet very liberally with corn meal.  Roll out your dough, flipping it over and adding flour to keep from sticking as needed, until it's as large and thick as you'd like it (for me, as big as my baking sheet will allow!).  Spread sauce, cheese, and toppings as desired, and bake for about 20 minutes until the cheese is hot and bubbly and the crust is golden.  Enjoy!!!

My Favorite Sandwich Bread

1.5 cups warm water
1.5 cups milk
1.5 Tbsp yeast
1.5 Tbsp salt
3 Tbsp honey
4 Tbsp unsalted butter, melted
3.5 cups all purpose flour
2 cups whole wheat flour
1 cup oat flour
1 cup rolled oats

Add first 6 ingredients as directed above, then add the flours and oats and mix.  Add either flour or liquid until it is elastic but still sticky.  Allow to rise as directed above.  After 2 hours, grease or spray a loaf pan with a neutral flavored oil.  Flour your hands and the top of the dough, and pull out half of the dough and form into a ball.  Stretch the ball slightly to elongate, and place in the prepared loaf pan.  Allow to rise another 45 minutes, uncovered.  (Do the same for the other half of the dough if you have two loaf pans. If not, you can make rolls, or refrigerate it for another day!)  Preheat oven to 450.  Melt a tablespoon of butter and brush the top of the loaf, and bake for 40 minutes or until deeply golden/browned.  This time, definitely wait until completely cooled before slicing.  

Friday, April 15, 2011

You can grow potatoes!

This post is the first in a series of 'you can do it' type stuff for the garden and whatnot!  We have a number of friends who have become interested in starting to grow their own food, and have asked us for advice on how to get started, so we thought that this would be a great way of helping people learn how to do it!  I would love if you read this post (or any of my posts) and think of someone who would appreciate it, that you pass a link on to them!  Often times starting a food garden for the first year can be a really daunting task, and a lot of gardening books and articles make it seem more complicated than it needs to be.  We hope to be able to spread the knowledge around so more people can learn to grow and enjoy their own food!!!  And so, we start with potatoes!

Though we've been growing food for about 6 years now, we only just did a potato crop for the first time last year, and it was a complete success!  Potatoes are extremely easy to grow, have great yields for very little effort, and are an excellent staple crop that is very easily stored.

Preparing to plant!
Potatoes will grow just about anywhere- in containers, in old tractor tires, in hay, in your compost pile, or any ol' garden bed.  The easiest way (apparently, we haven't tried it yet but want to!) is to just stick them in a mound of hay, let it do its thing, and come harvest time you don't have to work it out of the dirt, you just pull potatoes right out of the hay!  The only rule you really need to follow is making sure none of the potatoes are exposed to light.  Light turns potatoes green, and the green part is slightly toxic.  The way we prefer to plant them is in dirt, in a slight hole (rather than a mound), and cover the dirt with a good bit of hay.  As the tubers grow, if any peek up through the dirt, you can just add more dirt or hay to keep them in the dark.  Anyways, getting ahead of myself here.  All you need is some good, loose soil, and they'd love some compost if you have it (or can buy it).

And of course, you need some potatoes!  You can buy "seed" potatoes at garden stores or online nurseries, which are no different from what you'd buy at the grocery store, except they are probably already sprouting out the eyes.  If you can't find true seed potatoes, you can use potatoes from the grocery store, but you're better off buying organic potatoes (better chance that they are not a hybrid variety; you can't save seed from hybrids to use for next year). (If you buy potatoes from the grocery store, wait until they sprout before you get ready to plant them.  Some store bought potatoes are treated with an anti-sprouting spray.)  Last year we grew organic Russian Banana fingerlings.  This year we are trying Yukon Golds.  Larger potatoes (like Russets) need a longer growing season, so keep that in mind when choosing a variety.

24 hours before you want to plant them in the ground, you will need to cut the potatoes into pieces, with about 3 eyes per piece.  Let them sit overnight in a bowl or paper bag to allow the cut edges to dry, which will protect them from molding in the ground.

Planting day!
The best thing about planting potatoes is that you really can't screw it up.  As long as the ground isn't frozen anymore, you're good to go.  Roots and seeds know when the time is right for them to start growing.  If it's too cold for them, they won't grow until it's warm enough.  Smart, huh?  On planting day, you'll want to dig a hole about 3" deep, and the width of your shovel.  Put one piece of potato in each hole, and make each hole about three feet apart.  The spacing might seem wide, but trust me, the foliage will get huge, and the potatoes need lots of room!  If they cant grow outwards, they'll grow down, which means more digging come harvest time.  Fill the hole back in with the dirt, add some compost if you've got it, and cover with about 2" of hay just over the hole (you can find bales at feed stores, which will have the best certified seed free hay).  If you don't want to use hay, you'll need to plan the potato a few inches deeper in the dirt.  If you want to do them in containers, you'll need a quite wide container, as there needs to be plenty of room for those potatoes to grow!

The Waiting Game...
Different varieties take different lengths of time to get to harvest time, but the time between planting and harvest is really pretty easy.  Keep them watered, don't let the soil get bone dry, and if any tubers start peeking out into the light, cover them up with more dirt and/or hay (Hay is easier cause it's a whole lot easier to remove at harvest time than a whole lot of dirt!).  Potato foliage is beautiful, the flowers are really pretty (not all plants will flower, so don't freak out if yours don't), and some will even form little seed pods that look remarkably like tomatoes.  But BE FOREWARNED!  ALL parts of the potato plant EXCEPT the potatoes themselves are POISONOUS!!!  Potatoes are a member of the nightshade family, so if you have a curious kiddo who happens to like green tomatoes, keep an eye on them that they don't stick a potato seed pod in their mouth (been there, done that with Wyatt!).
Potato blossoms!

Their foliage is so big and beautiful! (That's only about 5 plants!)

Harvest Time!!!
When the summer is waning, the foliage of the plant will start to yellow- that means it's harvest time!!!  You don't have to worry about frost as long as they are in the ground.  You probably want to get them out of the dirt before it snows, but that's more a matter of convenience ;)  When you harvest, it's easiest to cut the foliage down so it's out of your way, and pull away the hay (it's all great for your compost pile!).  Be very careful as you dig, because scraping the skin of the potato will shorten the length of time you can store it.  The easiest way to safely loosen the dirt is to dig in a wide circle around each plant, loosening the dirt with a spade (like you would do to till a garden bed), but be careful when you put the shovel into the ground, push it in slowly so you don't chop a potato in half.  Then, it's a bit like a treasure hunt!  Break up chunks of dirt by hand, and be sure to go through the dirt all around the plants, because stray potatoes might have decided they liked a bit of privacy and gone deeper or further to the side of the plant than you might expect.  Once you think you've gotten them all, dig a little deeper just to be sure.  If you've planted in containers, you might even dump the whole container out on the ground to get every last little tuber.  Discard any potatoes with lots of green on them.  If there are potatoes with just little bits of green on an end, you can still eat those, just cut the green bit off before cooking.

Unfortunately, you probably don't want to cook a potato straight out of the ground.  They will be much better, and will do better in long term storage, if you let them dry in darkness for several days up to several weeks, to dry the skin (don't wash them!!!).  We put ours in cardboard boxes in layers between newspapers, and stuck them in the closet.  After this time, they are ready to eat and store!!!

Storing your harvest
Potatoes do best in darkness and dry coolness, in a very well ventilating container.  Brown paper bags are not ventilated enough, unfortunately... Wood boxes are probably best.  You can also store them in sand, or burlap sacks, though I don't recommend buckets, even with loose lids.  That's what we did, and all the potatoes we saved for seed to plant this spring ended up liquefied.  GROSS!  If you don't have a cool garage or basement, a dark cabinet will do, but if you have a big harvest, you'll need to find a cool space to keep them.  Don't put potatoes in the fridge though!!! Too cold, and the starch will turn to sugar, and while I love sweet potatoes, a sweet regular potato is not so tasty...  Only wash potatoes right before you cook them.

Last year, we planted 10lbs of potatoes in 48 holes, had 46 plants come up (We think the two that didn't grow were dug up by the dog), and got 55lbs of potatoes from those 46 plants.  Pretty freakin awesome!!! This year we are planting 20lbs!  Yay!!!

One of many boxes of our Russian Banana Fingerlings! Yum!!!

This is a case of mistaken identity...

Well, two weeks of chicken ownership has been wonderful! We didn't lose a single chick, no health issues, they grew so fast, and are nice healthy birds! But unfortunately, not all of them were the birds we wanted... We *thought* we had 12 Buff Orpington chicks, and thought the 8 darker ones maybe just had different parents or were just darker birds or something... Well, as they grew, so did their feathers, and as their feathers came in with patterns, we realized something wasn't right... It took until they were very nearly 2 weeks old before we were able to positively identify the 8 darker birds as Rhode Island Reds, a very beautiful breed no doubt, but not the right breed for us.  For one, they aren't as cold hardy and wouldn't do well in the winter here, and for two they are prone to be a more aggressive breed, and probably wouldn't get alone with the 4 Orpingtons we did have once they got older.  But thankfully, thanks to Craigslist we were able to find the Reds a new home, and take the 4 Orpingtons to Red's mom Kayla, and get 8 new Buff Orpington chicks for ourselves, all in one day!  Ca-RAY-zy!  So now we have 8 weeny teeny little yellow puffballs (and yes, this time they ALL are Orpingtons!), they are 4 days old today (or thereabouts, we got them on Wednesday, and are assuming they were day-olds then), and already have grown quite a bit.  It really is remarkable the difference in their behavior even at this tender age compared to how the Reds were, the first batch of chicks were constantly peeping and chirruping, but this batch is quite quiet in comparison!  They aren't as fond of being fed special treats (cracked wheat and oats) by hand by us yet, whereas the Reds weren't too shy of a hand full of treats, but these are much more tolerant of being picked up and held, whereas the Reds were very skiddish even at 2 weeks old of a hand without treats... Anyways, this new batch are healthy and doing well, and we're excited to get our flock right the second time ;)

(On a personal note, today is Wyatt's 3rd Birthday!!! My poor baby boy is so sick with a nasty tummy bug, and we've had to postpone his party, but we still have special stuff to do with him tomorrow even if he can't have friends over :(  Poor kiddo!  I think Red and I are more upset about it than he is though!)

Wednesday, March 30, 2011

Here chickie chickie chickie!

Today we grew our family by a whopping 12 teeny little girls!  No, I didn't just have duodecuplettes (PHEW!), we got CHICKS!  12 adorable teeny fuzzballs, all Buff Orpington pullets (female chicks).  We've been planning for some time now to get chickens, but weren't sure if we wanted to go with day old chicks (like these) or juvenile pullets, or even if we could find laying hens locally, but after no luck of finding free hens, and no luck finding pullets of the breed we wanted, we decided to go with chicks!  And luck have it, the local feed co-op has Buff Orpingtons!  We picked them up this morning, and they are happily chirruping away in their brooder box in our living room.  They'll live in this box for at least the first few weeks, as they need constant heat heat heat!  The first week, we have to keep them at around 95 degrees!  Fortunately this is easily done with a couple 60 watt incandescent bulbs and some nice dry warm and insulating wood shavings for litter.


Bean and Tig are both absolutely entranced, clearly they think this is the best thing that has ever happened here... Though the chickies are nice and safe in there!  Wyatt is excited too, and all of our new favorite activity is just sitting and watching them!  I am so excited to watch them grow, get to know their personalities and quirks!  No names for them yet, for one they're very hard to distinguish from one another (and will continue to be, as their feathers will be in a constant state of change for the next few months!).  They will begin laying in about 5-6 months, so come early fall we'll be enjoying delicious eggs!  Three of the twelve will go to Red's mom when they are about 6 weeks or so, past the fragile chickie stage and well on their way to being big girls!  Buff Orpingtons are a heritage breed, originally bred in England in the late 1800's.  They're a heavy breed, hens reaching around 8lbs at maturity, and they will lay large light brown eggs.  They're very cold hardy, and have small combs and wattles (the floppy things on their heads), and that's a good thing cause the bigger the combs and wattles are, the more prone they are to frostbite.  Here's a shot of a mature hen- (borrowed from pluckandfeather.com) 

Thursday, March 10, 2011

Sprout-tastic!

This winter, we got a sprouting kit put together for us by Red's mom Kayla!  We both realized we missed salads and fresh greens SO badly, and storebought lettuce was remarkably disappointing after the awesome lettuce and greens we grew ourselves last summer.  Kayla has been sprouting for a long time, and helped us to get started with an awesome kit she assembled for us for Christmas.  Sprouts are delicious, crazy easy to grow, and amazingly nutritious.  It's a great way to get home grown nutrition in the winter!  Here is how we grow ours, but be sure to check out sproutpeople.org for everything you could possibly need to know about sprouting!  (They also carry seeds, sprouting equipment, all sorts of good stuff!)  

All we use to grow our sprouts are wide mouth quart sized mason jars with a small circle of non-metal window screen and the screw band that goes with the jar.  Other than seeds to sprout, that is all you need!  We have a great seed mix from sproutpeople.org that we LOVE that includes clover, arugula, cress, fenugreek and dill seeds.  It is the perfect mix, and tastes amazing on sandwiches, in burritos, and even by itself with a little dressing!  We tried sprouting mung beans, but didn't like the flavor, so now we stick to this seed mix.  To grow a quart of sprouts, it only takes about two tablespoons of these seeds, so it's a great value by volume!  

Step 1- Soak em!

First off, measure out your seeds according to the variety (different seeds will grow different amounts, so check on sproutpeople.org for how much to use so you get a good amount of sprouts but don't end up with an overstuffed jar).  Put the seeds in the jar, put the screen over the top and screw on the band.  Fill up the jar (through the screen) with cool water and let the seeds soak 8-12 hours (or however long is needed for the variety you are using, again, see sproutpeople for individual seed instructions).
Our favorite seed mix has some pretty small seeds, so we use two layers of screen until they begin sprouting and become big enough not to fall through the screen.

Step 2- Rinse, Repeat! 

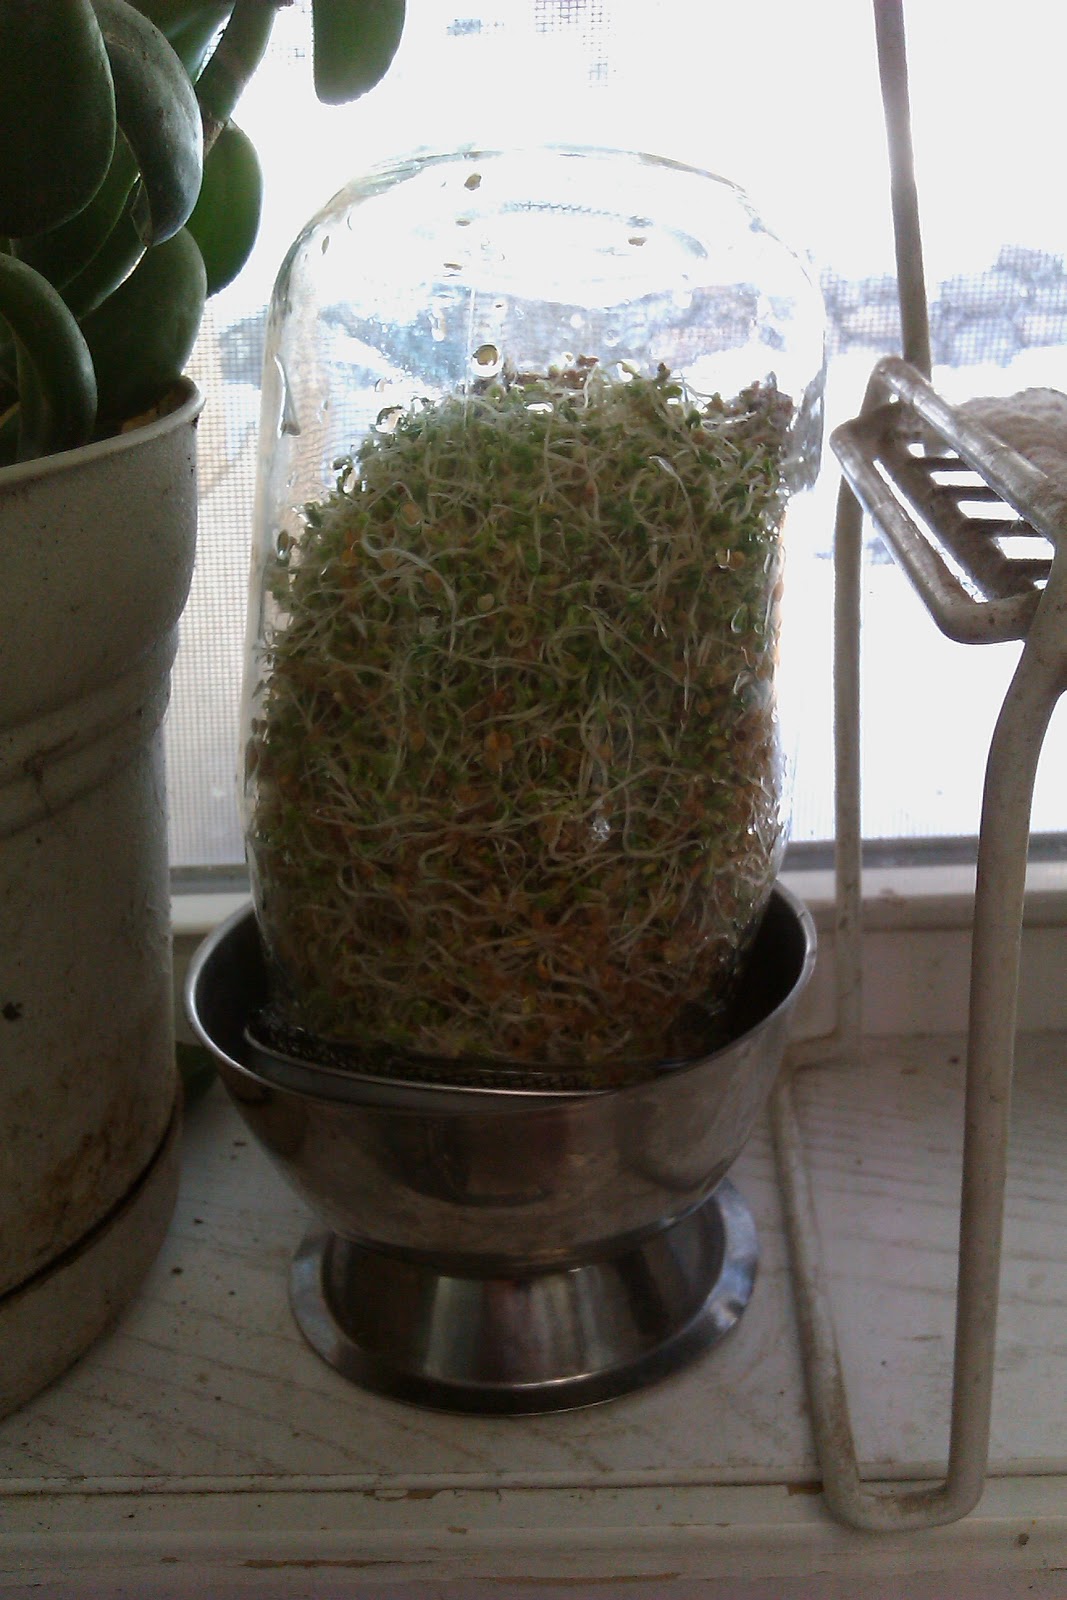
After your initial soak, drain the water out, fill with cool water, and swirl it around to make sure every little seed gets wet, then drain it off again, getting as much water out as you can.  Then tip the jar upside down and set it at an angle in a bowl, which will allow any leftover water to drain out without leaving the seeds too wet, and allow good airflow.  We keep ours on our kitchen windowsill, so we don't forget about rinsing them!  It doesn't get any direct sunlight this time of year so it's ok for us, but don't put your jars in direct sunlight.  I do recommend keeping them in or near the kitchen, so you'll be less apt to forget about them! 

   Rinsing; The first signs of growth, day 2

Repeat the rinsing and draining every 8-12 hours or so.  Doesn't have to be spot on timing wise, but you don't want the sprouts to dry out completely.  Since we keep ours by the sink, we usually rinse them in the morning while coffee is brewing, and again around dinnertime.  You will start to see the first signs of growth about 36 hours after you first put them up to soak (or sooner or later depending on the variety of seed).  At first the sprouts will be short, spindly and white, but once they get started, they really take off!  You'll notice the hulls of the seed start to fall off once the leaves start to form, around day 4-5.  
Here are our sprouts at about day 5. Notice the brown hulls of the seeds- they fall off on their own, but are still edible.  We don't bother with separating them out, though most end up in the bottom of the jar anyways.
We keep two jars going at different intervals to keep a steady supply of sprouts growing.  
These jars are at day 5 and day 2, respectively.

Step 3- Enjoy!

We've started eating our sprouts as early as day 4, but they are best when they've had a chance to get bigger and greener, around day 6 or 7.  We store our sprouts in the jars on the sill just like when they're growing, since they usually get eaten quite quickly.  But if you'd like to store your sprouts for longer, they will need one final rinse, then a thorough drying out (try a salad spinner or laying them out on a paper towel), and will need to be stored in an airtight container in the fridge (you could store them in the jar they were grown in, just replace the screen with the regular lid).  We've never gotten to that point, since we eat them too quickly!  They are amazing on sandwiches or in burritos or fajitas, and we've even eaten them by themselves in a bowl with a little dressing, like a micro-salad!  Wyatt even loves them, and stuffs them into his mouth by the handful!  They're so tasty, it's a wonder it took us this long to do our own sprouts!  Yum!


Tuesday, February 22, 2011

The other was served from a chafing dish...

Cheers to you if you know what song the title is from... Extra special Cheers to you if you know it and are not a Morgenstern! ;)  Anyways- A month or so ago, we were given some stuff from a friend's storage barn.  Among our new-to-us stuff were five chafing dish holding racks.  Our idea for them was to make a fabric basket liner for them, and use them for harvest baskets and around the house.  I finally figured out my new-to-me serger this weekend, and yesterday I made the first liner!  It's secured with ties so it can be removed for washing, and was really quick and easy to make once I figured out how to attach it to the bare bones wire frame of the chafing rack.


And in more fun with repurposing/reusing stuff, Red made me some new shelves in my laundry closet, out of timbers from Lost Mine Timber Co., his timber reclamation company.  Yay!!! (These timbers were reclaimed from the King Coal Mine)  Bet I'm the only housewife with historic reclaimed wood shelving in her laundry room ;)  I love the extra space, and the neatness of it, and I'm excited to find some nice containers for laundry detergent and lint and whatnot at garage sales this spring! (Need something nicer than an old Folgers can!)


Wow, it looks really nice in this picture!  Sure it's clean now; let's hope I keep it that way!  You can't see it, but there's a shelf on top of the cabinets with about three feet of vertical space above it, and there's quite a lot of stuff stored up there, pleasantly out of sight!  And now we each have a basket (on the top shelf in the pic) for our hats and gloves and whatnot! YAY for storage! Even though I can close the doors to it all, I don't want to because it looks so nice now!  

And just for fun, here's Wyatt helping Daddy make bread the other night!  (Who wants to make Red a bumper sticker that says "Real Men Bake"?)