Wednesday, November 2, 2011

Well, I did it yet again- I let another exorbitant amount of time go by between posts.  And shame on me that it happened during the growing season!  I had great intentions of posting at least weekly this summer, with updates on growth progress and planting and all that, and clearly that didn't happen.  Not to say it wasn't a busy and eventful summer (perhaps because it was a busy and eventful summer?).  

Things did pretty well in the garden this year, and I think we were both happier with our choices of where we planted what.  The greenhouse was almost exclusively tomatoes (three different varieties, Yellow Pear and I can't remember the other two...), though we also had blackberries (thornless) and strawberries (Seascape everbearing) in there too.  Though not unseasonably early, we have had some cold weather this fall, and none of our tomatoes were able to ripen on the vine.  After several days and nights of having to run a space heater in the greenhouse to ward off the frost, we decided our electric bill would appreciate us ripening them indoors.  We've had excellent success, some huge tomatoes (the largest weighing in at 1 lb .3oz), and made 4.5 quarts of awesome salsa.
ripening tomatoes
awesome salsa! 
In the front bed, we had six different lettuces- three romaine types, and three loose leaf mix types.  The lettuce was great in the beginning, but we had some pretty hot and dry weather that turned it all bitter a lot sooner than I'd have hoped (it has since become fodder for the hens, which they are very happy with).  Our herb bed did marginally well.  Only one basil came up out of who knows how many seeds, though I think it was largely due to overcrowding by all the tomatillos we didn't plant...  (We had a LOT of 'volunteers' come up in just about every bed this year, from seeds that survived the winter in the compost- mostly tomatillos, and a good number of squash and pumpkins.  One spaghetti squash came up in the greenhouse, and produced an ENORMOUS squash, easily a 5 pounder.  And we ended up with 5 gallons of tomatillos, which is nuts considering we never meant for them to grow in the first place!)  Our Calendula did fabulously, it bloomed for months and months (it's STILL blooming, in November! Bonkers!), and you can bet we're saving as much seed as we can.  Calendula (or pot marigold) is a wonderful medicinal plant, and the variety we grew is a medicinal variety, so we're saving the flowerheads as well.  It's mostly used for topical ointments for cuts, bruises, rashes, etc.  
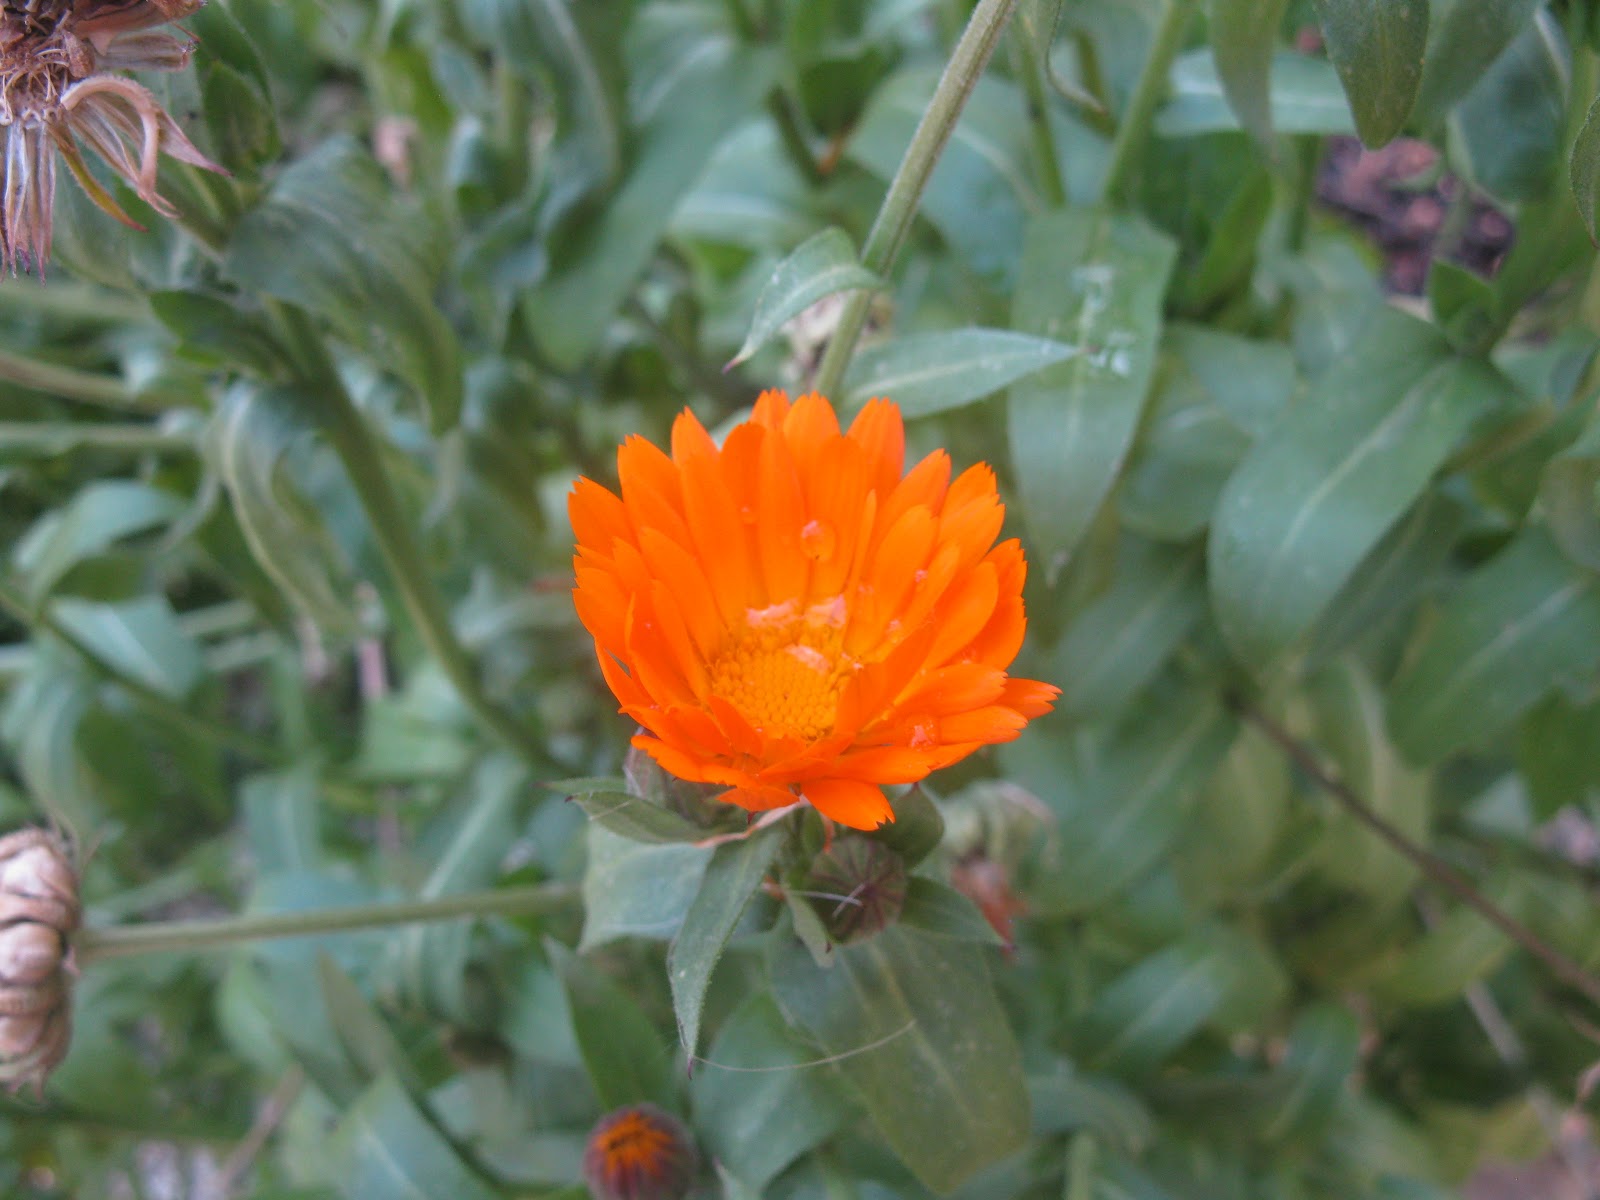
A stoic Calendula bloom, bright and shiny in November!


Our potatoes did marginally well this year.  We planted a different variety than last year, a standard yukon gold, but they were slow to start, had pretty small foliage growth, and they all got hit by some sort of blight.  They yellowed very prematurely, and many of them died above ground.  Despite their ill-health, we still got a good amount of potatoes, but not as much as we would have expected from the number of plants we grew.  Oddly enough, some of the sickest looking plants yielded the most/biggest potatoes, so maybe they were just putting all their energy into growing below ground rather than above.  We won't be saving any of these for planting next year, we'll have to figure out a better variety.  Maybe the Russian banana fingerlings we did last year, as those were healthy and beautiful and delish ;)

Our hens are doing marvelously!  They are BIG birds, and they're a riot.  They're pretty quiet, until you come in their pen, then they get noisy and silly and Wyatt loves to chase them.  And you definitely can't wear crocs in their pen, cause they see those little holes as an invitation to peck your toes!  We got our first egg from them a few weeks ago.  It was so cute and little!  For a while, it was clear there was only one layer, but now they are all starting to figure it out!  Still not sure how many of them are getting to it, as the number of eggs varies each day- Yesterday, two.  Today, five!  But the eggs are gradually getting bigger, and they're finally figuring out what those nice cozy boxes in there are for!  
Well hello girls!
A nice cozy nesting box, finally being put to use!
 As winter is just around the corner for us (it's flurrying as I type), we've been putting things away for the winter, stocking up on wood, and doing a good amount of canning.  We bought 8 heads of cabbage in September and made a huge batch of the best sauerkraut we've ever had.  Aside from requiring 6 weeks of patience, it was crazy easy to make.  We also made a green salsa with half the tomatillos we grew, and a sweet jam with the other half.  We still have cherries and peaches in the freezer to make jam with, as when we put that up, it was too hot to cook and can jam.  Better to save that kind of chore for when slaving in a hot kitchen is a cozy thing to do!
Stocking up the root cellar
As for sewing projects, it's been a busy summer.  I made the first pair of pants for Red out of a plain cotton canvas, but the fabric turned out a little too lightweight, and they shrunk quite a bit lengthwise.  They're good summer weight pants, except for the nasty tear at the shin that happened the first time he ever wore them, while on a hiking trip.  Whoops...  To make up for it, I finally got around to making him three, yes three, pairs of heavy denim jeans just a couple weeks ago.  They came out excellent, will hold up much better to the heavy abuse Red inflicts on his work clothes, and are definitely long enough this time.  I also turned some truly vintage quilt blocks into a tablecloth.  The blocks were passed down to me from Red's grandmother, though they were actually sewn (entirely by hand) by HER mother, anywhere from 60 to 90 years ago.

And now that we're officially on the holiday countdown, it's time to start work on Christmas gifts.  Still not sure on every item, (I've had a number of requests for aprons!) but I'm experimenting with some homemade slippers- I made the first pair for myself, but might try something a little different for a second pair (for myself as well, teehee).  Wyatt definitely wants a pair though, and keeps trying to steal mine!
Soft and fuzzy slippers!
Just a sneak peek, as this is a gift yet to be given, but wanted to share my first friendship star quilting project ;)
Then of course there's what we want for Christmas, which I am SO excited for, and will be getting early, from my awesome parents- an electric grain mill!!!  We've had our hand crank mill for over a year now, and definitely won't be going back to only storebought flour, so it's about time we treat ourselves to a mill that doesn't feel like a workout or chore!  I think we've decided on the Miracle grain and flour mill, as it will be able to handle larger stuff like beans and corn, and it doesn't create a mess of flour dust like the other home flour mills available.  I've been given the go-ahead to order it whenever, and though I'd love to be patient and wait till Christmas, I don't think I can wait much longer!  Perhaps I should use this as an excuse to end this blog post?  Hmm... sounds good to me! ;)

Friday, July 8, 2011

Most recent sewing projects

Before my project list is taken up with pants after pants after pants for Red, I decided to do some me projects.  Two are re-fashions (turning old clothes into new), and one is made entirely of fabric I got for free (go freecycle!).

The first project was turning a rather formal gown into a fun top and skirt!  I started out with the dress I wore for my college graduation- a gorgeous embroidered sparkley thing, far too formal for anything I would ever go to, ever... But that was just too fun to let go to waste in my closet.  Biting the bullet and cutting it in half took some courage, but I'm SO glad I did!  The top turned out great- I did a rolled hem along the bottom (love my serger!), replaced the super-thin spaghetti straps with wider ones, and made a new zipper pull (the old one was broken off).  The fabric is a very slinky acetate, which has a gorgeous drape, but is dry-clean only, so this will be a special occasion shirt.  I don't do dry cleaning ;)  The skirt, on the other hand, didn't turn out as great.  It was tricky, since the new waist where I cut it was far too wide (the dress originally was flowy, not fitted), so it took some finagling to get it narrow enough to not look weird but still big enough to do an elastic waistband (hadn't thought about needing a zipper until it was too late).  Also, I shortened it by several inches (I needed the fabric for the new shoulder straps), so that made figuring the waist a little funkier.  Meh, I was more excited to have the top than the skirt anyways ;)

The second project was turning an old skirt into a new halter top!  I had a cute organic cotton skirt from Patagonia, but it wasn't something I wore frequently at all (in fact, it was in the giveaway pile until I realized I could use the fabric for something else).  It's a thick, stretchy jersey, and perfect for a pattern I had in my stash for a halter top, so yesterday I just went for it and made it!  I hadn't sewed from a pattern in a few years (since my Dorothy costume, in fact) and I had forgotten how much I like sewing from a pattern!  It takes all the worry and guesswork out, which may seem like it takes the creativity out, but whatever, it was easy and quick and turned out perfectly, which I can't say would have happened had I made it up as I went!

And the third project was a nice lightweight nightgown, made of fabric and some lace trim that I got on freecycle last year.  I did use a pattern I had to cut the pieces, but constructed it my own way, and I like it!  Nice and light for summer!


Oops, I did it again...

Oops... I let another long span go by between posts... I had great intentions of keeping up much more closely with my blog this summer, keeping up with regular updates on the garden and whatnot, but that just hasn't happened.  Summertime is twice as busy for me as wintertime, since I have both the inside and the outside to take care of!

The garden is doing really well, things are finally starting to look like plants!  Our first crop of lettuce in the greenhouse is long gone, replaced by lots of tomato plants, the blackberries in the greenhouse are growing, and we've already tasted the first strawberries!  Outside the greenhouse, our outdoors crop of lettuce is getting gorgeous, the potato plants are shooting up and filling out with gorgeous foliage, beans and peas and greens are growing, and the cherry trees are laden with young fruits.  Our hens are doing wonderfully!  We now have 10 Buff Orpingtons (got two from Red's mom that are a couple weeks younger than the original 8), they're about 3 months old now and SO BIG!  They look full grown, but they aren't done yet!  They're probably only around 2-3lbs right now, if that, and Orpingtons can get to be around 8lbs!  They are a hoot to watch, fun to hang out with, though don't wear sandals (and especially not crocs!) cause they love to peck at toes!  The very best is letting them out of the coop in the morning.  They fly and flutter and run around, so glad to be out in the fresh air!

We've had quite a few run-ins with bears this year, far more than usual, and have had to stop composting for a while until we can get some electric fencing up.  We've never had problems with critters like this before.  We had a couple visits last year from bears, but there was a period of about two weeks where we had a bear almost every night, and several visits during the day, which is not so common around here.  We even had a bear rip the cam-strap off our trash can, which has never failed us as bear protection before, so now we keep the trash locked in the zircon up the hill.  We haven't had any trouble the past two weeks or so, but for a while it was getting pretty ridiculous, and we now have a rule that no one goes outside without the dog (at any time of day or night).  Whiskey has definitely earned his keep, chasing bears away!  I'm just thankful we don't have any grizzlies around here, that our bears are relatively smaller and less aggressive black bears.

I'm extremely excited, because a big order of all sorts of fabrics is due to arrive this afternoon!  I'm going to be rebuilding Red's work clothes wardrobe from scratch, and I'm actually really excited about it!  I've made pants before, but never anything with a true tailored waistband and fly.  It should be a really fun challenge, and I can't wait to take it on!

In the meantime, some pictures of the garden and hens, taken today!

 The lettuce and onion bed!

 Blackberries climbing in the center, tomatoes around the walls, strawberries everywhere else

 Pole beans


Some of the many potatoes!

Friday, April 22, 2011

You can bake! And the ultimate pizza dough!

Since last fall, we've been baking all our own bread.  There's always a loaf on the counter or dough in the fridge (and usually there's both!).  Baking bread is so easy, and not at all the time consuming task non-regular bakers think of.  Baking seems to be enjoying a bit of a renaissance these days, and I want to spread the good word!

Bread Basics
Great bread is all about ratios.  Stick to the correct ratios, and you really can't go wrong!  The magic numbers are these: 1.5, 1.5, 3, 6.5.  That's 1.5 Tbsp yeast, 1.5 Tbsp salt, 3 cups water, and 6.5 cups flour.  It's so simple it's crazy!  And you can follow the same numbers for substituting, as long as the total numbers stay the same.  (Don't substitute anything for the yeast or salt, those are key ingredients!)  For example, I like a softer sandwich loaf, so I do 1.5 cups water and 1.5 cups milk.  As long as it's 3 total cups liquid, you're good to go.  Same goes with flour (though I don't recommend using more than half whole wheat, it makes for a very dense loaf).  I also like adding some sweetener (usually honey), but that doesn't follow a set ratio; I usually add a couple tablespoons of honey, I don't really measure (but it's not crucial to measure it).  Same goes for adding a fat (butter, oil).  I usually just add a few tablespoons.  

Mixing Method
In a large bowl (or a large stand mixer with a dough hook), add the liquid (room temp or slightly warmer, not hot but not cold), yeast, and salt, (and fat and/or sweetener if you're using it) and stir to dissolve the salt.  Then add in 6 cups of flour, and mix it all together with a wooden spoon (or on slow speed) (add the last .5 cup flour if it's too wet).  You want it to be fairly wet, but dry enough to feel elastic.  Don't mix with your hands if you can avoid it- this often leads you to add too much flour.  The dough should still be pretty dang sticky.  Cover it with plastic wrap, and let it sit for about 2 hours.  Don't worry about punching it down, or whether the volume doubles or triples.  It doesn't matter! The yeast knows what to do!  If you're not ready to bake after the 2 hours are up, pop it in the fridge.  It is wet enough to last several days to a week!
Elastic enough to form a ball, but the shape shouldn't last long!

Baking Time!
After the 2 hour rising mark, you're ready to shape.  This recipe works best for free form 'artisan' style loaves, rolls, etc.  (See below for sandwich loaf variation)  Flour your hands and your work surface liberally, and flour the top of the dough.  Liberally sprinkle corn meal on a baking sheet.  Grab a good hunk of dough, form it into a ball, and place it on the corn mealed baking sheet.  Allow to rise uncovered for half an hour.  A few minutes before baking time, preheat the oven to 450 degrees F.  Melt a tablespoon of butter (salted or unsalted, your choice) and gently brush the surface of each loaf.  Bake for at least 30 minutes, but possibly as much as 45, depending on the size of the loaf.  The top should be crisp and browned, not just golden.  Trust me, it's way better to overbake than underbake!  Allow to cool completely before slicing, if you can resist!

The Ultimate Pizza Dough
This recipe follows the same ratio, only on a 2/3rd smaller scale, and will make a beautiful big and fairly thick pizza (after all, delicious dough deserves a thicker crust!).  Follow the above ratio if you would rather make two medium pizzas, or one large and some breadsticks, etc.  

2 cups water
1 tbsp yeast
1 tbsp salt
1 tbsp sugar
2 tbsp olive oil
4 cups flour (I think it's best half white flour half whole wheat!)

Combine the first five ingredients as directed above, then add flour and mix and allow rise as directed above.  After the 2 hour rise, you're ready to shape your pizza.  You'll need a LOT of flour on your work surface and hands and rolling pin.  Preheat the oven to 450, and prepare your toppings.  Cover a baking sheet very liberally with corn meal.  Roll out your dough, flipping it over and adding flour to keep from sticking as needed, until it's as large and thick as you'd like it (for me, as big as my baking sheet will allow!).  Spread sauce, cheese, and toppings as desired, and bake for about 20 minutes until the cheese is hot and bubbly and the crust is golden.  Enjoy!!!

My Favorite Sandwich Bread

1.5 cups warm water
1.5 cups milk
1.5 Tbsp yeast
1.5 Tbsp salt
3 Tbsp honey
4 Tbsp unsalted butter, melted
3.5 cups all purpose flour
2 cups whole wheat flour
1 cup oat flour
1 cup rolled oats

Add first 6 ingredients as directed above, then add the flours and oats and mix.  Add either flour or liquid until it is elastic but still sticky.  Allow to rise as directed above.  After 2 hours, grease or spray a loaf pan with a neutral flavored oil.  Flour your hands and the top of the dough, and pull out half of the dough and form into a ball.  Stretch the ball slightly to elongate, and place in the prepared loaf pan.  Allow to rise another 45 minutes, uncovered.  (Do the same for the other half of the dough if you have two loaf pans. If not, you can make rolls, or refrigerate it for another day!)  Preheat oven to 450.  Melt a tablespoon of butter and brush the top of the loaf, and bake for 40 minutes or until deeply golden/browned.  This time, definitely wait until completely cooled before slicing.  

Friday, April 15, 2011

You can grow potatoes!

This post is the first in a series of 'you can do it' type stuff for the garden and whatnot!  We have a number of friends who have become interested in starting to grow their own food, and have asked us for advice on how to get started, so we thought that this would be a great way of helping people learn how to do it!  I would love if you read this post (or any of my posts) and think of someone who would appreciate it, that you pass a link on to them!  Often times starting a food garden for the first year can be a really daunting task, and a lot of gardening books and articles make it seem more complicated than it needs to be.  We hope to be able to spread the knowledge around so more people can learn to grow and enjoy their own food!!!  And so, we start with potatoes!

Though we've been growing food for about 6 years now, we only just did a potato crop for the first time last year, and it was a complete success!  Potatoes are extremely easy to grow, have great yields for very little effort, and are an excellent staple crop that is very easily stored.

Preparing to plant!
Potatoes will grow just about anywhere- in containers, in old tractor tires, in hay, in your compost pile, or any ol' garden bed.  The easiest way (apparently, we haven't tried it yet but want to!) is to just stick them in a mound of hay, let it do its thing, and come harvest time you don't have to work it out of the dirt, you just pull potatoes right out of the hay!  The only rule you really need to follow is making sure none of the potatoes are exposed to light.  Light turns potatoes green, and the green part is slightly toxic.  The way we prefer to plant them is in dirt, in a slight hole (rather than a mound), and cover the dirt with a good bit of hay.  As the tubers grow, if any peek up through the dirt, you can just add more dirt or hay to keep them in the dark.  Anyways, getting ahead of myself here.  All you need is some good, loose soil, and they'd love some compost if you have it (or can buy it).

And of course, you need some potatoes!  You can buy "seed" potatoes at garden stores or online nurseries, which are no different from what you'd buy at the grocery store, except they are probably already sprouting out the eyes.  If you can't find true seed potatoes, you can use potatoes from the grocery store, but you're better off buying organic potatoes (better chance that they are not a hybrid variety; you can't save seed from hybrids to use for next year). (If you buy potatoes from the grocery store, wait until they sprout before you get ready to plant them.  Some store bought potatoes are treated with an anti-sprouting spray.)  Last year we grew organic Russian Banana fingerlings.  This year we are trying Yukon Golds.  Larger potatoes (like Russets) need a longer growing season, so keep that in mind when choosing a variety.

24 hours before you want to plant them in the ground, you will need to cut the potatoes into pieces, with about 3 eyes per piece.  Let them sit overnight in a bowl or paper bag to allow the cut edges to dry, which will protect them from molding in the ground.

Planting day!
The best thing about planting potatoes is that you really can't screw it up.  As long as the ground isn't frozen anymore, you're good to go.  Roots and seeds know when the time is right for them to start growing.  If it's too cold for them, they won't grow until it's warm enough.  Smart, huh?  On planting day, you'll want to dig a hole about 3" deep, and the width of your shovel.  Put one piece of potato in each hole, and make each hole about three feet apart.  The spacing might seem wide, but trust me, the foliage will get huge, and the potatoes need lots of room!  If they cant grow outwards, they'll grow down, which means more digging come harvest time.  Fill the hole back in with the dirt, add some compost if you've got it, and cover with about 2" of hay just over the hole (you can find bales at feed stores, which will have the best certified seed free hay).  If you don't want to use hay, you'll need to plan the potato a few inches deeper in the dirt.  If you want to do them in containers, you'll need a quite wide container, as there needs to be plenty of room for those potatoes to grow!

The Waiting Game...
Different varieties take different lengths of time to get to harvest time, but the time between planting and harvest is really pretty easy.  Keep them watered, don't let the soil get bone dry, and if any tubers start peeking out into the light, cover them up with more dirt and/or hay (Hay is easier cause it's a whole lot easier to remove at harvest time than a whole lot of dirt!).  Potato foliage is beautiful, the flowers are really pretty (not all plants will flower, so don't freak out if yours don't), and some will even form little seed pods that look remarkably like tomatoes.  But BE FOREWARNED!  ALL parts of the potato plant EXCEPT the potatoes themselves are POISONOUS!!!  Potatoes are a member of the nightshade family, so if you have a curious kiddo who happens to like green tomatoes, keep an eye on them that they don't stick a potato seed pod in their mouth (been there, done that with Wyatt!).
Potato blossoms!

Their foliage is so big and beautiful! (That's only about 5 plants!)

Harvest Time!!!
When the summer is waning, the foliage of the plant will start to yellow- that means it's harvest time!!!  You don't have to worry about frost as long as they are in the ground.  You probably want to get them out of the dirt before it snows, but that's more a matter of convenience ;)  When you harvest, it's easiest to cut the foliage down so it's out of your way, and pull away the hay (it's all great for your compost pile!).  Be very careful as you dig, because scraping the skin of the potato will shorten the length of time you can store it.  The easiest way to safely loosen the dirt is to dig in a wide circle around each plant, loosening the dirt with a spade (like you would do to till a garden bed), but be careful when you put the shovel into the ground, push it in slowly so you don't chop a potato in half.  Then, it's a bit like a treasure hunt!  Break up chunks of dirt by hand, and be sure to go through the dirt all around the plants, because stray potatoes might have decided they liked a bit of privacy and gone deeper or further to the side of the plant than you might expect.  Once you think you've gotten them all, dig a little deeper just to be sure.  If you've planted in containers, you might even dump the whole container out on the ground to get every last little tuber.  Discard any potatoes with lots of green on them.  If there are potatoes with just little bits of green on an end, you can still eat those, just cut the green bit off before cooking.

Unfortunately, you probably don't want to cook a potato straight out of the ground.  They will be much better, and will do better in long term storage, if you let them dry in darkness for several days up to several weeks, to dry the skin (don't wash them!!!).  We put ours in cardboard boxes in layers between newspapers, and stuck them in the closet.  After this time, they are ready to eat and store!!!

Storing your harvest
Potatoes do best in darkness and dry coolness, in a very well ventilating container.  Brown paper bags are not ventilated enough, unfortunately... Wood boxes are probably best.  You can also store them in sand, or burlap sacks, though I don't recommend buckets, even with loose lids.  That's what we did, and all the potatoes we saved for seed to plant this spring ended up liquefied.  GROSS!  If you don't have a cool garage or basement, a dark cabinet will do, but if you have a big harvest, you'll need to find a cool space to keep them.  Don't put potatoes in the fridge though!!! Too cold, and the starch will turn to sugar, and while I love sweet potatoes, a sweet regular potato is not so tasty...  Only wash potatoes right before you cook them.

Last year, we planted 10lbs of potatoes in 48 holes, had 46 plants come up (We think the two that didn't grow were dug up by the dog), and got 55lbs of potatoes from those 46 plants.  Pretty freakin awesome!!! This year we are planting 20lbs!  Yay!!!

One of many boxes of our Russian Banana Fingerlings! Yum!!!

This is a case of mistaken identity...

Well, two weeks of chicken ownership has been wonderful! We didn't lose a single chick, no health issues, they grew so fast, and are nice healthy birds! But unfortunately, not all of them were the birds we wanted... We *thought* we had 12 Buff Orpington chicks, and thought the 8 darker ones maybe just had different parents or were just darker birds or something... Well, as they grew, so did their feathers, and as their feathers came in with patterns, we realized something wasn't right... It took until they were very nearly 2 weeks old before we were able to positively identify the 8 darker birds as Rhode Island Reds, a very beautiful breed no doubt, but not the right breed for us.  For one, they aren't as cold hardy and wouldn't do well in the winter here, and for two they are prone to be a more aggressive breed, and probably wouldn't get alone with the 4 Orpingtons we did have once they got older.  But thankfully, thanks to Craigslist we were able to find the Reds a new home, and take the 4 Orpingtons to Red's mom Kayla, and get 8 new Buff Orpington chicks for ourselves, all in one day!  Ca-RAY-zy!  So now we have 8 weeny teeny little yellow puffballs (and yes, this time they ALL are Orpingtons!), they are 4 days old today (or thereabouts, we got them on Wednesday, and are assuming they were day-olds then), and already have grown quite a bit.  It really is remarkable the difference in their behavior even at this tender age compared to how the Reds were, the first batch of chicks were constantly peeping and chirruping, but this batch is quite quiet in comparison!  They aren't as fond of being fed special treats (cracked wheat and oats) by hand by us yet, whereas the Reds weren't too shy of a hand full of treats, but these are much more tolerant of being picked up and held, whereas the Reds were very skiddish even at 2 weeks old of a hand without treats... Anyways, this new batch are healthy and doing well, and we're excited to get our flock right the second time ;)

(On a personal note, today is Wyatt's 3rd Birthday!!! My poor baby boy is so sick with a nasty tummy bug, and we've had to postpone his party, but we still have special stuff to do with him tomorrow even if he can't have friends over :(  Poor kiddo!  I think Red and I are more upset about it than he is though!)

Wednesday, March 30, 2011

Here chickie chickie chickie!

Today we grew our family by a whopping 12 teeny little girls!  No, I didn't just have duodecuplettes (PHEW!), we got CHICKS!  12 adorable teeny fuzzballs, all Buff Orpington pullets (female chicks).  We've been planning for some time now to get chickens, but weren't sure if we wanted to go with day old chicks (like these) or juvenile pullets, or even if we could find laying hens locally, but after no luck of finding free hens, and no luck finding pullets of the breed we wanted, we decided to go with chicks!  And luck have it, the local feed co-op has Buff Orpingtons!  We picked them up this morning, and they are happily chirruping away in their brooder box in our living room.  They'll live in this box for at least the first few weeks, as they need constant heat heat heat!  The first week, we have to keep them at around 95 degrees!  Fortunately this is easily done with a couple 60 watt incandescent bulbs and some nice dry warm and insulating wood shavings for litter.


Bean and Tig are both absolutely entranced, clearly they think this is the best thing that has ever happened here... Though the chickies are nice and safe in there!  Wyatt is excited too, and all of our new favorite activity is just sitting and watching them!  I am so excited to watch them grow, get to know their personalities and quirks!  No names for them yet, for one they're very hard to distinguish from one another (and will continue to be, as their feathers will be in a constant state of change for the next few months!).  They will begin laying in about 5-6 months, so come early fall we'll be enjoying delicious eggs!  Three of the twelve will go to Red's mom when they are about 6 weeks or so, past the fragile chickie stage and well on their way to being big girls!  Buff Orpingtons are a heritage breed, originally bred in England in the late 1800's.  They're a heavy breed, hens reaching around 8lbs at maturity, and they will lay large light brown eggs.  They're very cold hardy, and have small combs and wattles (the floppy things on their heads), and that's a good thing cause the bigger the combs and wattles are, the more prone they are to frostbite.  Here's a shot of a mature hen- (borrowed from pluckandfeather.com) 

Thursday, March 10, 2011

Sprout-tastic!

This winter, we got a sprouting kit put together for us by Red's mom Kayla!  We both realized we missed salads and fresh greens SO badly, and storebought lettuce was remarkably disappointing after the awesome lettuce and greens we grew ourselves last summer.  Kayla has been sprouting for a long time, and helped us to get started with an awesome kit she assembled for us for Christmas.  Sprouts are delicious, crazy easy to grow, and amazingly nutritious.  It's a great way to get home grown nutrition in the winter!  Here is how we grow ours, but be sure to check out sproutpeople.org for everything you could possibly need to know about sprouting!  (They also carry seeds, sprouting equipment, all sorts of good stuff!)  

All we use to grow our sprouts are wide mouth quart sized mason jars with a small circle of non-metal window screen and the screw band that goes with the jar.  Other than seeds to sprout, that is all you need!  We have a great seed mix from sproutpeople.org that we LOVE that includes clover, arugula, cress, fenugreek and dill seeds.  It is the perfect mix, and tastes amazing on sandwiches, in burritos, and even by itself with a little dressing!  We tried sprouting mung beans, but didn't like the flavor, so now we stick to this seed mix.  To grow a quart of sprouts, it only takes about two tablespoons of these seeds, so it's a great value by volume!  

Step 1- Soak em!

First off, measure out your seeds according to the variety (different seeds will grow different amounts, so check on sproutpeople.org for how much to use so you get a good amount of sprouts but don't end up with an overstuffed jar).  Put the seeds in the jar, put the screen over the top and screw on the band.  Fill up the jar (through the screen) with cool water and let the seeds soak 8-12 hours (or however long is needed for the variety you are using, again, see sproutpeople for individual seed instructions).
Our favorite seed mix has some pretty small seeds, so we use two layers of screen until they begin sprouting and become big enough not to fall through the screen.

Step 2- Rinse, Repeat! 

After your initial soak, drain the water out, fill with cool water, and swirl it around to make sure every little seed gets wet, then drain it off again, getting as much water out as you can.  Then tip the jar upside down and set it at an angle in a bowl, which will allow any leftover water to drain out without leaving the seeds too wet, and allow good airflow.  We keep ours on our kitchen windowsill, so we don't forget about rinsing them!  It doesn't get any direct sunlight this time of year so it's ok for us, but don't put your jars in direct sunlight.  I do recommend keeping them in or near the kitchen, so you'll be less apt to forget about them! 

   Rinsing; The first signs of growth, day 2

Repeat the rinsing and draining every 8-12 hours or so.  Doesn't have to be spot on timing wise, but you don't want the sprouts to dry out completely.  Since we keep ours by the sink, we usually rinse them in the morning while coffee is brewing, and again around dinnertime.  You will start to see the first signs of growth about 36 hours after you first put them up to soak (or sooner or later depending on the variety of seed).  At first the sprouts will be short, spindly and white, but once they get started, they really take off!  You'll notice the hulls of the seed start to fall off once the leaves start to form, around day 4-5.  
Here are our sprouts at about day 5. Notice the brown hulls of the seeds- they fall off on their own, but are still edible.  We don't bother with separating them out, though most end up in the bottom of the jar anyways.
We keep two jars going at different intervals to keep a steady supply of sprouts growing.  
These jars are at day 5 and day 2, respectively.

Step 3- Enjoy!

We've started eating our sprouts as early as day 4, but they are best when they've had a chance to get bigger and greener, around day 6 or 7.  We store our sprouts in the jars on the sill just like when they're growing, since they usually get eaten quite quickly.  But if you'd like to store your sprouts for longer, they will need one final rinse, then a thorough drying out (try a salad spinner or laying them out on a paper towel), and will need to be stored in an airtight container in the fridge (you could store them in the jar they were grown in, just replace the screen with the regular lid).  We've never gotten to that point, since we eat them too quickly!  They are amazing on sandwiches or in burritos or fajitas, and we've even eaten them by themselves in a bowl with a little dressing, like a micro-salad!  Wyatt even loves them, and stuffs them into his mouth by the handful!  They're so tasty, it's a wonder it took us this long to do our own sprouts!  Yum!


Tuesday, February 22, 2011

The other was served from a chafing dish...

Cheers to you if you know what song the title is from... Extra special Cheers to you if you know it and are not a Morgenstern! ;)  Anyways- A month or so ago, we were given some stuff from a friend's storage barn.  Among our new-to-us stuff were five chafing dish holding racks.  Our idea for them was to make a fabric basket liner for them, and use them for harvest baskets and around the house.  I finally figured out my new-to-me serger this weekend, and yesterday I made the first liner!  It's secured with ties so it can be removed for washing, and was really quick and easy to make once I figured out how to attach it to the bare bones wire frame of the chafing rack.


And in more fun with repurposing/reusing stuff, Red made me some new shelves in my laundry closet, out of timbers from Lost Mine Timber Co., his timber reclamation company.  Yay!!! (These timbers were reclaimed from the King Coal Mine)  Bet I'm the only housewife with historic reclaimed wood shelving in her laundry room ;)  I love the extra space, and the neatness of it, and I'm excited to find some nice containers for laundry detergent and lint and whatnot at garage sales this spring! (Need something nicer than an old Folgers can!)


Wow, it looks really nice in this picture!  Sure it's clean now; let's hope I keep it that way!  You can't see it, but there's a shelf on top of the cabinets with about three feet of vertical space above it, and there's quite a lot of stuff stored up there, pleasantly out of sight!  And now we each have a basket (on the top shelf in the pic) for our hats and gloves and whatnot! YAY for storage! Even though I can close the doors to it all, I don't want to because it looks so nice now!  

And just for fun, here's Wyatt helping Daddy make bread the other night!  (Who wants to make Red a bumper sticker that says "Real Men Bake"?)  

Monday, February 14, 2011

Happy Valentines Day!!!

Happy Valentines Day to you all!  I hope everyone's day has been wonderful!  Mine has been wonderfully mellow, thanks to my parents taking Wyatt to the rec center to swim and splash and have fun!  I took advantage of the me time and made myself a Valentines gift!  (But Red can take the credit) ;)  I used to love beading when I was a kid but haven't done any beadwork since I was probably 12 or 13 or so, and just last week I dug up my collection of beads that I had stashed in my shed.  I also found a cool bracelet kit out there, and decided why not make it!  And so I did!
 It was a lot of fun, and totally reignited my love of jewelery making!  So later last week, I decided to splurge a bit, and I bought some white freshwater pearls to make a necklace for myself! (But hardly a splurge, they were $7 at Walmart!)  So today, during my downtime I made myself this necklace!


I'm really excited to make more jewelery! I have a number of cool beads and stones and pendants from old necklaces that fell to disrepair or just could use some new life, and I'm excited to give them that new life!  I'm really thinking of making jewelery to sell on etsy or something similar, as it's relatively quick work and I have so many beads already (and therefore don't need to purchase much of anything to get going).  It's fun and satisfying work, and I'm so glad to be getting back into it! 

Sunday, February 13, 2011

A Chandler for the weekend!

No, not the character from Friends, a candlemaker!  I received a box full of candlemaking supplies, and decided this weekend to make candles!  I've done it before but not for years, and not with as nice supplies!  In the box (among many other things) was about 10 pounds of gorgeous beeswax, so we started out with that.  I absolutely love the smell of beeswax, and it burns so nicely!  We made some in molds, others in mason jars.  And it was a group project, as Trent, Sherry and John came over to hang out and help out!

Today, after taking the candles out of the molds, I decided why not keep at it, since we had all the equipment out anyways!  So instead of using fresh wax, we melted down all the random chunks and old pieces of candles we've saved over the years, sorted by color so we could try some layering!  Many of the bits and pieces were from scented candles, and combining them all made for some interesting and very nice new scents!


Wednesday, February 9, 2011

Orville Redenwhateverhisnameis ain't got nothin on me!

I don't know about you guys, but lately, we've been broke, so what doesn't get spent on bills goes to grocery essentials like milk and eggs, with no room for splurges on snack foods.  This is just fine with me, cause processed food only tastes good until you look at the ingredients label... (And if it still tastes good after that, well...)  So part of our new routine is coming up with yummy snacks from scratch.  We do variations on bread, and that's great, and I've tried making crackers and things, but nothing quite satisfies cravings for something salty and/or sweet and/or crunchy like kettle corn! (in fact it satisfies all three all at once!)  I don't really like buttered or plain popcorn, but kettle corn I could go nuts for (and do), but didn't know how to make it myself.  Sure, a package of microwave popcorn is super easy and quick, but it is not cheap considering what popcorn actually is... Plus who knows what weird stuff is in the microwaved kind (I don't know, since I don't have any on hand, but use your imagination)  After doing some research online and a few trial runs, I have successfully made the most awesome, delicious, addictive, and cheap snack food ever.  If you've never popped corn on the stove (and I don't mean in one of those UFO foil thingies), there is nothing to be scared of if you pay attention to what you're doing, and the end result is even better than the microwaved kind and takes the same amount of time.  And now, without further ado, but without a photo cause I ate it all before I could take a picture cause it was too damn good, my recipe for homemade kettle corn!

What you need-
A large sauce pot with a good fitting lid, preferably see through (the lid)
oven mits or potholders if the pot and lid have metal handles
about 1/4 cup vegetable oil (enough to completely coat the bottom of the pan, but not be deep)
1/4 cup popping corn
2-3 tablespoons white sugar
salt to taste

What to do-
Put the oil in the saucepan, and place three corn kernels in the pan, and turn on the heat (medium-high is good).  Wait until all three kernels pop, and pour in the rest of the kernels.  Holding the lid on tight, every 10 seconds or so lift the pot and shake it around to keep the kernels or any popped kernels from burning.  Once about half the kernels are popped, carefully pour in the sugar (but beware as kernels might fly out of the pot if you take the lid too far off.  It's best to have the sugar in one container that you can dump in all at once rather than dumping the sugar in a spoonful at a time).  Adding the sugar will slow if not stop the popping, but keep shaking the pot every few seconds to help distribute the sugar and keep the kernels and sugar from burning.  The rest of the kernels should pop within a minute or so.  When the popping slows to one pop every couple seconds (just like when you microwave popcorn), quickly dump all the popcorn into a bowl.  (It's not enough to take the pot off the heat, if you leave the popcorn in there the sugar will burn and so will the popcorn)  Sprinkle on some salt and stir the popcorn around with a spoon *IT WILL BE EXTREMELY HOT!!!* Don't burn yourself on molten sugar!  Let the popcorn cool a bit before you enjoy!  It will be so worth the wait!

That all may sound involved, but it really isn't!  The whole process takes maybe 4 minutes, and the end result is SO much better than anything out of the microwave!  You can fiddle with the amount of sugar and salt, and most recipes I found say to add the sugar at the same time as the kernels, but I found that adding it halfway through the popping practically eliminates any risk of burnt sugar, while still giving an even coating.  This recipe will yield a big bowl of popcorn, certainly enough for me and Wyatt to share, but if you're serving a crowd or just really really love popcorn, feel free to double it (but keep in mind you'll need a pretty big sauce pot).  I'm not sure how much one bag of microwave popcorn costs, but I have a feeling it's much much more than what this recipe costs, which I estimate to be around $0.10 total.  (The $2.50 bag of popping corn I bought yesterday yields 28 servings at 1/4 cup per serving (and I'm sure you can find popping corn for cheaper than that, but I happened to be in a specialty grocery store), which is $.08 per serving, plus a trivial amount of oil and sugar and salt, which I am generously valuing at $.02)  I can't think of ANYTHING that you can get a big bowl of for only ten cents... Not potato chips, not even flour or milk or bottled water or rice or anything!

And if you're a crazy person and don't like kettle corn (but I can't imagine why anyone wouldn't, especially not the homemade kind), you can always stick to plain ol' salt on your popcorn, or melt a little butter, or a personal fave of mine- nutritional yeast and Parmesan cheese!  (Seriously, if you've never had nutritional yeast on popcorn, do yourself a favor and go buy some! It is SO yummy (and not just on popcorn) and really good for you, lots of B vitamins!)

Now if they could only invent a popping corn that doesn't have the annoying shell of the kernel part that always gets stuck in your teeth... ;)

Wednesday, January 26, 2011

A simple life = a clutterless life?

Lately we've been talking about and trying to make some pretty huge life decisions.  Our big dreams in life all involve being debt-free, owning significant acreage, growing things, making things, and generally living a simple life.  We've realized that in order to make the first two dreams reality, we need to move.  Much as we LOVE where we live, it is just too dang expensive.  And the third part of our dream would be a lot more fulfilling and easier in a somewhat milder climate.  So while we haven't made final decisions on where and when, I've realized no matter where or when or how, we have way too much stuff to move out of this house.  I think about moving into a new house, and no matter if this hypothetical new house is larger or smaller than our current house, the thought of dealing with all the STUFF we have accumulated over the years makes me want to throw it all out in a pile in the backyard and light it all on fire.  Just get rid of everything, and start over from scratch!  Tempting as that might be, it wouldn't be very economically efficient.

Speaking of economic efficiency, I am a collector.  Not so much of nicknacky things anymore (though I definitely was as a kid, and couldn't possibly part with a small collection of my favorite childhood nicknacks that have special sentimental value), but of things that could some how, some day, be useful to me.  As a crafter, I think it's in my wiring to save things that I could use at some future date in some project, some piece of clothing that with a little tweaking could be just right, some scrap of fabric or bit of hardware or, well, you get the idea.  The intention behind it is always genuine, and if I would ever get around to using said item, would be very frugal of me, since I could make something out of it, rather than need to buy the finished product new, or the parts for said finished product.  But as wonderful as the intentions might be, my closets and cabinets and storage boxes would probably think otherwise.  Red is a culprit as well, but on an even larger scale, but fortunately the things he brings home for future use can generally be stored outside up at his shop (lumber, building materials, stove pipe, scrap metal, you name it he can find it for free).  This isn't all to say we don't eventually use this stuff- we do, and quite happily, just not at the same rate as we collect the stuff...

And not all our stuff is things for future projects- We of course have things like Wyatt's baby clothes and toys, books and old magazines, three drawers full of VHS movies we'll probably never watch again, all sorts of things... Our house is fairly small, and our closet and cabinet space is seriously prime real estate, but no matter how hard I try, it seems like all the flat surfaces in our house end up covered in STUFF.  Usually it's transient stuff, a box of things to be stored, papers to be filed, clean laundry to be folded... But it drives. me. nuts.  I am not a neat freak by any means, and generally I'm a pile person, but the clutter on the counters, tables, dressers, wherever, gets to me after a while.  It's so easy to just toss something on the counter or table, deal with it later, but when later comes around it's just like UGH... Clutter!

Getting rid of clutter is not easy for me to do.  I can totally understand how people turn out to be hoarders.  After all, everything has SOME value.  It might only be a few cents, but that's a few cents you wouldn't have to spend if one day you find you need that something and don't have it.  But it's not very condusive to a stress free and clean house... I am slowly but surely reteaching my brain not to get attached to objects as easily anymore.  It's not easy, but I'm working on it.  And one of the main ways I'm doing it is by thinking about moving.  Not only the physical part of packing it and hauling it and unpacking it (even paying someone else to do all that), which is enough to make me want to throw almost anything away, but also, I pretend that our future house is half the size of our current house.  That would be one heck of a small house!  Where on earth would you put everything?  While most small houses are pretty ingeniously designed to maximize storage in every possible nook and cranny, the thought of living in such a small house with all this stuff makes my skin crawl.  If we downsized our house by half, we'd have 650 square feet to eat, sleep, play, live, and bathe (Small as 650 square feet might be, I will not give up indoor plumbing just to save space).  To be able to do all that in such a small space really makes me question the value of every object I would bring in the door.

So with all that in mind, I am cleaning out our house.  I have gone through my closet and set aside all the items of clothing I haven't worn in a long time, or that don't fit quite right, or that aren't flattering or comfortable, or have holes or stains, and it's an impressive amount of clothing (and I don't have a very big wardrobe to pull from to begin with!).  I'm using up all the half used bottles of shampoo and conditioner and stuff I've stashed under my bathroom sink before buying anything new.  I'm going through all of Wyatt's toys, and eventually I'll go through his old clothes too (though I'm willing to bet that will be the hardest part for me).  Even going through our kitchen items and asking myself do we REALLY use this utensil/baking dish/pot or pan?  Even if we do use it, is it really worth the space it takes up if we only use it once or twice a year?  If we didn't have it, can we use something else in its place or is it really a specialty item?

What to do with all this stuff?  Like I said, it all has some value, and rather than toss things or give things away on freecycle or to the thrift store, first I'm going to try to squeeze as much of that potential value out of it all as I can.  I have set a goal for myself, to hold a yard sale on Memorial Day weekend.  Setting a concrete goal like that is really helping me stay motivated, and the thought of getting money (even if it is just a few cents or dollars) for all this stuff is really helping motivate me to find as much stuff to sell as possible!  In the meantime, all the things I find to get rid of, I'm storing out in my craft shed, since I can't really use it in the winter anyways, and since it probably wouldn't be warm enough to be out there a lot until after Memorial Day weekend anyways (specifically warm enough at night, since my sewing machine can't get too cold).  Any stuff that doesn't sell at the yard sale will go on freecycle and/or to the thrift store, cause there's no sense in not giving all this stuff a second chance with someone else!

And to all future items I might think would be useful somehow sometime in the future, I am making a firm 'what goes in must come out' rule with this house-  Besides food, any item that comes into this house must earn its spot here by some other item (preferably of equal size/type) giving up its spot for the new one.  This means, for example- any new clothing item must earn its hanger/drawer space by me getting rid of an old clothing item.  Fortunately (or unfortunately, however you want to look at it), we haven't been in much of a financial position to be buying any new anything, but this rule stands true even for items received for free, hand me downs or freecycle items or anything.  And I'm also doing my best to have a "touch it once" policy, where instead of just tossing the mail on the counter to deal with later, I sort it and deal with it right when I bring it in the house.  Hopefully, with a little luck and a whole lot of effort, when we do come to the time to pack up and move, the job will be a lot less stressful and a lot easier, and the time between now and then will be spent in a much neater, less cluttery house!  Wish me luck!!!

Thursday, January 20, 2011

Project catch-up!

This morning I was archiving photos on my computer, and discovered photos of a whole mess of projects that I haven't shared on here!  And I also realized that I failed to take photos of about 90% of the Christmas gifts I made this year, and that that must be remedied!  I'll go in the order they were made, going way back to July 2010!

Probably one of the largest projects I've ever taken on (in yardage, at least) was this bivy sack for Red!  (A bivy is a waterproof cover for one person, in place of an actual tent)  I was ecstatic to find an excellent resource for outdoor fabrics, Outdoor Wilderness Fabrics, which has everything you could need to make tents, packs, etc.  Including the pattern for this bivy!  It was fun to make, but the design needs some tweaking.  It's difficult to get in and out of, so it needs an opening running along the side or across the top.  Also it's VERY warm, which is good some of the time, but without better ventilation could be rather uncomfortable... But the important thing is it's very lightweight and quite waterproof!

 My next project was this quilted casserole carrier that I made for Red's Grandy Jean.  She handed down to me a huge stash of fabrics, and this fabric was in the stash.  She had sent me photos of a friend's casserole carrier, and from that I came up with the pattern for this one.  It was a bit of an experiment, and I ended up tweaking the construction for a carrier I made my mom for Christmas (which is one of the projects I need photos of, cause it came out AWESOME).  This was my first project that I did freehand machine quilting on, and while the quilted swirls were by no means perfect, I'm still pretty proud of it ;)


My next project was a wee one, a fabric covered business card display holder.  I actually made two of these, the first didn't come out quite as well constructed, but this one is now currently in use displaying my cards at the Country Market!


This year I made Wyatt's Halloween costume, he was a Garden Gnome! (Specifically, David the Gnome, though I didn't realize I had made a nearly exact David the Gnome costume until after it was already made!  But even the colors are just like David's outfit!)  At the Vallecito Service League's annual kids Halloween party, his costume won Most Original Costume!  Yay!  I had a lot of fun making it, and Wyatt had a lot of fun wearing it!  (If only I could get him to wear the beard!)


Next up came the Christmas gift rush.  Despite having made nearly all the gifts we gave this year, I only have photos of one of them!  Whoops!  I made Red this apron, which he actually requested (so it's not weird that I made my husband a cooking apron, right?)  For other gifts we gave, there was the aforementioned casserole carrier I made my mom, which I really must get photos of because it is probably the first larger-scale project I've ever sewn that I didn't have to rip out a single stitch on!  (Hopefully you can appreciate how big an accomplishment that is!)  Also, the quilting on it came out SO well, if I do say so myself!  I also made everyone embroidered fleece hats, neck tubes and scarves, and they came out awesome!  Hopefully I can convince my family to take photos of themselves wearing their goodies?  Hint hint! ;)  

This winter I also started a quilt for Wyatt, and though it was originally intended as a Christmas gift, it isn't anywhere near finished yet, since it got backburnered in favor of the fleece things and other gifts.  It's a crazy quilt, made of about 22 miscellaneous fat quarters I had in my stash that I finally decided to do something with!  Though you can't really see what fabric is what here, it can give a sense of just how involved even a simple square patchwork quilt can be!  There are somewhere around 400 patches to be sewn, just for a twin sized quilt!  Fortunately it's pretty easy going, as they're all square and I'm not following any particular pattern, and no funky angles involved or anything. 


And that's the rundown of all my sewing projects since last summer!  :D