

30 minute project- Clothespin Bag!
I got the idea for this bag one, by the awesome weather we're finally having (perfect for drying laundry outside!) and two, from checking out ideas on the internet (just do a google image search for "clothespin bag" and you'll see lots of cute stuff!). I make no claim to the design though, since I kind of copied one I saw pictured online. I made it in about half an hour, probably less even, and I'm hoping that this will be the first in a series of quick projects, ones I hopefully can do start to finish during naptime! :D
This project uses a single fat quarter of fabric. What's a fat quarter, you say? If you're not into quilting (or cute fabric hoarding, like me), you might not know that a fat quarter is a 1/4 yard of fabric, but cut in such a way that it's 'fat', not long and narrow like if you asked for a 1/4 yard of fabric cut for you at the craft store. Most places sell fat quarters already cut, since it's a quilting thing. Even my Walmart's puny fabric section has fat quarters, both individually and in bundles of coordinating fabrics. You could go the high-tech route and make this out of a weatherproof fabric, like a coated ripstop like a tent is made out of, but they don't usually come in cute patterns, so I opted for a funky batiq cotton instead ;)
Materials-
Fat quarter of cute fabric
Children's size coat hanger (not wire)
bias tape or ribbon to match
Step 1- Cutting the pattern-
Fold the fat quarter into a square, and trim the extra edge (keeping the selvage edge of the fabric, if there is one)

Fold it into another triangle, with the first folded edge on the bottom (This will make the bottom of the bag), and place the hanger on top as shown below, halfway along the hanger, with enough room at the edge of the hanger for a seam allowance.

Trim the sides and the top edge as shown below, leaving adequate seam allowance.

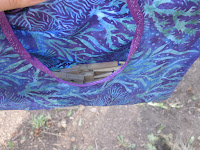
Next, unfold the fabric, and refold it the long way once. Cut a keyhole shaped hole, large enough to fit your hand in easily, but keeping the bottom fold of the bag in mind (so don't make the hole too far down, or the pins will spill out!)

This is what your fabric should look like once all the cuts are made, and completely unfolded.

Step Two- Bias tape-
sew the bias tape or ribbon to the edges of the keyhole opening. I machine basted the ribbon to the wrong side of the fabric first, then folded it over the edge of the fabric and sewed it to the right side, using a decorative zig zag stitch (which also helps the ribbon to lie flat and hold the opening open when completed)


Also sew a piece of bias tape or ribbon to the top edge of the back of the bag (I just basted it on)

Step Three- Assembly-
Next, bring the RIGHT SIDES TOGETHER, and sew along the edge seams of the bag, starting at the top of the keyhole opening to ensure evenness as you sew towards the folded bottom edge of the bag.

Here's the completed bag, inside out. Trim any ribbon/tape ends and thread, turn right side out, and...

Add the hanger and VOILA! Ready to go!

A nice full load of pins!
Sure beats struggling to stick the pins back on the line when your arms are full of clean laundry! :D

ok. thats really cute. i think i'd rather just pay you to make me one and ship it though!
ReplyDelete